From ALV to List Report (Introduction)
You want to switch from a report with ALV to a RAP object with a list report? Where can you find the different functions for starting and integrating it? Let's look at the comparison in detail.

Table of contents
In this article, we'll look at the basic setup for comparing a classic ALV report to a List Report (Fiori Elements) in the new world.
Introduction
When migrating from a classic GUI transaction and a classic report to the modern Fiori world, it can be quite helpful to compare which functions are available, in what form, and how they are implemented. With this in mind, we've created this short series in which we examine a classic, table-based report and provide the exact same functionality in a RAP application using Fiori Elements. Thus, we can compare both applications and their various features.
List Report
Why the List Report? The List Report is a standard floor plan used within Fiori Elements and is generally generated when you model a RAP object and use UI annotations. In addition to the actual List Report as an entry point, an Object Page is also generated. However, we don't find this in the traditional world, because a program essentially only uses the List Report to output and display data. Based on current and personal experience, the List-Report-Floorplan is used in conjunction with the Object Page for approximately 80-90% of applications. This standardized approach covers the majority of application requirements and is very close to the actual ALV as we know it from the past.
Start
Let's first look at how we create the basic configuration to run an application in the system.
Transaction
In the traditional world, we create a transaction for this purpose. Applications defined behind a transaction can be started via that transaction. A transaction receives a text and a package to which it is assigned, and depending on the transaction type, a program is started with a selection screen or in another form. Basically, a program doesn't have to have a transaction; we can also start a program directly via transaction SE38 or SA38.

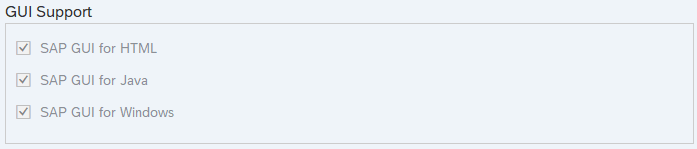
In a transaction, we can also define what support the transaction includes, in this case for the SAP GUI. Do we support the HTML, Java, and Windows versions, or perhaps only individual components because there are specific special logics or functions within our application? In this example, we have no exceptions.
Configuration
In order to later call an application in the Fiori Launchpad, we need to define a basic configuration. This includes the semantic object and the action we need to navigate to the application in the Fiori Launchpad. Unlike the transaction, this is a mandatory configuration, as the application cannot be called correctly otherwise. Similar to a transaction, the semantic object and the action together are the unique key to identifying and invoking the application.

Under the navigation, you can then define settings for whether the application works on the desktop, tablet, or phone. These settings address different resolutions and sizes, and not every application needs to be designed to run and be used on, for example, a small phone. This allows us to manage support for the different versions, similar to how we manage support for the SAP GUI.
Menu
In this chapter, let's look at how we can make the application available so that the user can access it from their entry point.
SAP Menu
The entry point in the SAP GUI world is the SAP menu, along with its various favorites. The authorization administrator can extend the SAP menu and make additional entries to include our own reports and transactions in the standard menu. If we are the business user and already know our transactions, we can also create and maintain our own favorites so that we can work with them immediately after logging into the system. In this case, we have added our test program to our favorites menu. Direct navigation via the transaction in the upper part of the SAP GUI is also possible.

Fiori Launchpad
To access an application in the Fiori Launchpad, you can integrate it via the "My Home" page, as was the case in this example. Basically, you can also search for the application using the search function at the top of the Launchpad if you know its name, title, or other information. This is quite similar to favorites, as you manage your Fiori applications yourself here. If you're working in the standard menu area, you would, for example, set up Pages and Spaces to make the applications available to the end user. This way, they are integrated at fixed points and can be opened.

Such applications are then always integrated as tiles. Here you have various formats, such as a half tile where only the text is visible, a full tile as in this example, or you can also customize additional information such as a counter, a subtitle, or color formatting. Basically, you have several more options available here before the user enters the actual application.

Complete Example
In this chapter you will find all the resources for comparing the two applications. We've placed the RAP object in a new repository so you can clone it. The program is simply a resource also located in this repository. You can use the table and generation class from the repository to generate the data for the report. If you're on the same system, then you only need the table and the class once.
Conclusion
With that, we've completed the first part, in which we wanted to show how to access the application, start it, and what's needed for basic configuration. We won't delve into the details of the development, but rather look at the final result and compare the different functions.