Fiori for ABAP - Navigation Parameters
What happens if too many parameters are passed during navigation and the target app no longer displays the correct result? Navigation parameters can be a possible solution, which we will now examine in detail.

Table of contents
In this article, we will discuss app-to-app navigation in detail and examine the effect of parameters in the target app.
Introduction
A particular challenge with app-to-app navigation is passing the correct parameters to produce the correct result in the target app. This can range from filtering individual entries to navigating to the object page. Many factors influence this, such as the source parameters in our calling app and the mapping in the target app. These are the various components we should examine in detail to ensure correct navigation in the future.
Preparation
Before diving into the example, we should prepare a small target app that we can access to test how the various parameters affect the app. We also need the calling configuration, which we define in another app.
Navigation Target
Therefore, we first need a target app that serves as our navigation tool. For this, we define a small application or projection on our Sales App. We rename several important fields to enable parameter mapping and target mapping, in this case the UUID, partner number, and currency. We then generate a service and deploy the application, as we need this to test the navigation.
define root view entity ZBS_C_NavigationTarget
  provider contract transactional_query
  as projection on ZBS_R_SASALE
{
  key UUID          as UniqueKey,
      PartnerNumber as Partner,
      SalesDate,
      SalesVolume,
      SalesCurrency as Currency,
      DifferenceAmount,
      DifferenceCurrency,
      DifferenceQuantity,
      DifferenceUnit,
      SaleComment,
      LoggingId,
      LocalCreatedBy,
      LocalCreatedAt,
      LocalLastChangedBy,
      LocalLastChangedAt,
      LastChangedAt
}
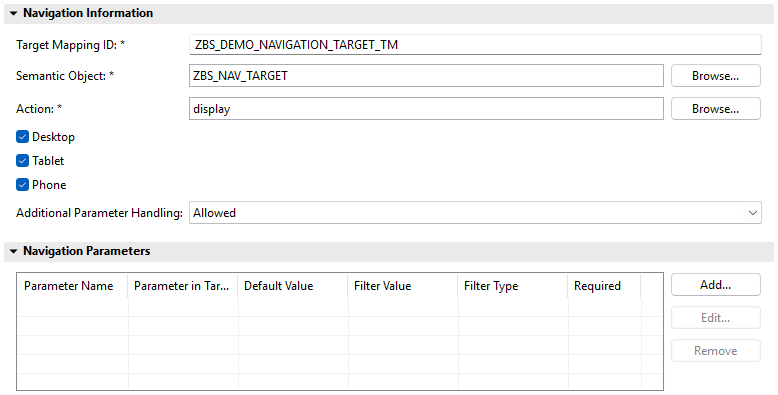
Next, we create a Launchpad App Descriptor Item and leave the navigation section at its default for now. Here, we also create a tile, which we then integrate into the Launchpad and assign to a role so that the app is visible in the Launchpad. You can find more details about this small application in the GitHub repository linked below.
Navigation
In our sales app, we then adjust the navigation for the partner number and define the new navigation target here: our newly created app. This app functions as a display app, meaning its action is also defined as "display". So, the next time we open the app and navigate using the partner number, we will land on our new navigation app and can then test the navigation between the two applications in detail.
@UI.lineItem: [
  { position: 20,
    type: #WITH_INTENT_BASED_NAVIGATION,
    semanticObject: 'ZBS_NAV_TARGET',
    semanticObjectAction: 'display'
  }
]
PartnerNumber;
Problem
So where exactly does the problem with the navigation lie? Let's look at a test navigation scenario: We open our app and click on a partner. The navigation then takes us to the new app as the target app, and filters are already pre-selected. However, information such as the partner or the currency is missing. Since we placed this information in new fields in the target app, these fields are not automatically mapped and populated. However, there is additional information that we hadn't expected, such as the date or the sales volume.
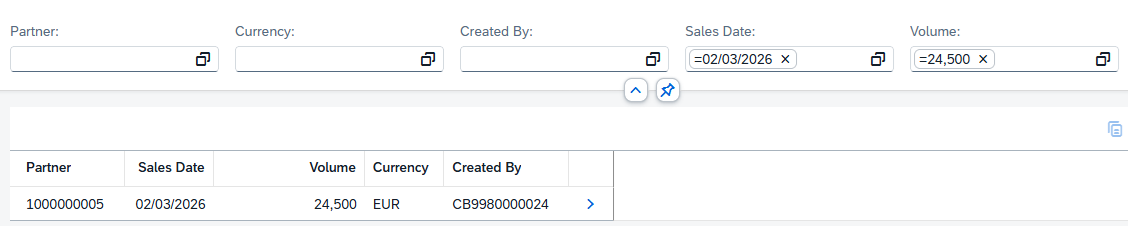
Now, let's adjust the URL. Behind the actual navigation, we find the various parameters that are passed to execute the navigation. Not only the keys are passed, but all parameters defined on this line, such as the icon. The partner number is present, just under a different name, and other information such as the criticality defined there. All this information is then taken and mapped to the selection fields in the target app. This results in the following image in the display and the applied filters (values have been separated into new lines).

However, this behavior now leads to problems with navigation. For example, date fields that we pass are also filled, but which could be completely different in our target app. Likewise, key fields are not mapped as we need them to be. This is where the navigation parameters come into play, which we need to define the correct target parameters for ourselves.
Additional Handling
In the first step, we look at the "Additional Parameter Handling" setting. This is set via the navigation parameters and has three settings available.

To make the parameter work, we should define an initial pair of navigation parameters. We enter the parameter name "PartnerNumber," which is the parameter we receive from our source app. And the target parameter in our current application, namely "Partner." No further settings are necessary here.

Ignored
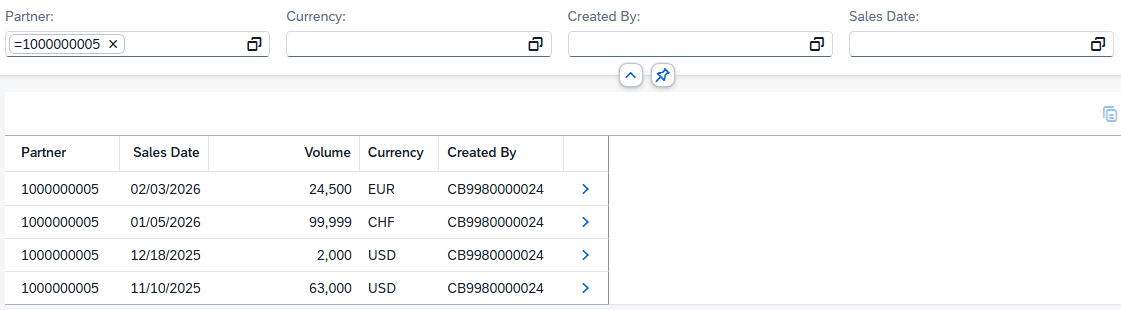
If we set the setting to IGNORED, all incoming parameters except those defined by our mapping will be ignored. As a result, we receive the filtered partner that we were passed. All other filters will be empty.
Allowed
With ALLOWED, our configured mappings are applied first, so that the partner is populated, for example, and then all additional parameters passed are also mapped. In this case, other criteria are also filled, so the selection restricts further entries and we only get one entry.

Not Allowed
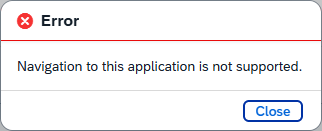
With the third setting, NOT ALLOWED, we get an error message immediately if we try to navigate from the source app. Since we are automatically passing parameters here, but these are not allowed, our request is completely blocked, and navigation no longer works.
Navigation Parameters
Let's take a look at the functionality and mapping of the individual parameters and see how it works using two examples. The setting is set to IGNORED to only use the mapping.
Mapping
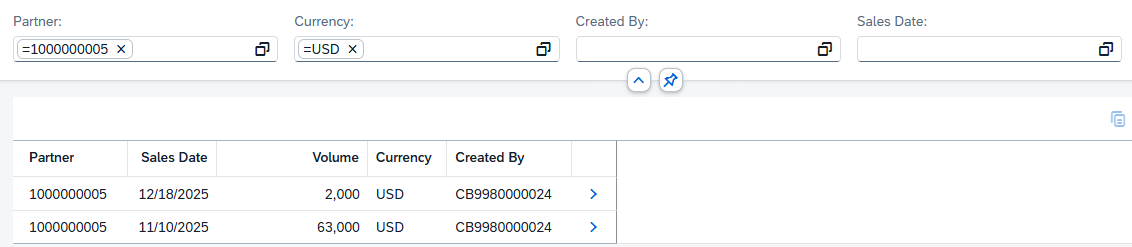
In the first example, we create two parameters with different names. This is the incoming parameter, and we map it to our internal fields "Partner" and "Currency". We leave all other inputs at their default values.

Clicking a row executes the navigation and transfers the two pieces of information to the filters. This results in multiple data sets, as we are not filtering by the key.
Further Parameters
As a second example, we define an additional parameter: the sales date, which has the same name as in our source app. However, all parameters are ignored due to the IGNORED suffix. Therefore, we must specify this mapping entry additionally so that the parameter also arrives in our filter.

If we now perform the navigation, all three filters are pre-filled and we only get the one row that we also clicked in the original app.

Object Page
So far, we have always navigated to the List Report. Now the question arises: Can we actually jump directly to an Object Page entry? We will look at two examples in this chapter.
Key
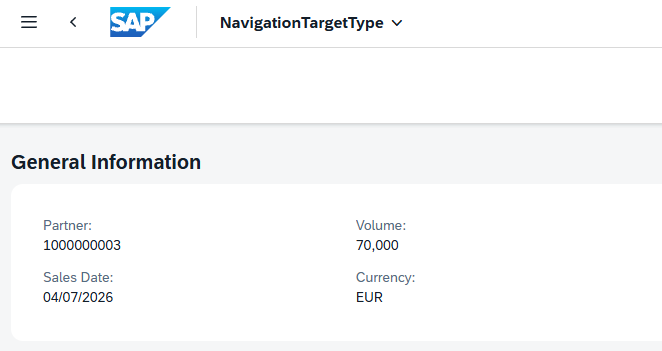
In the first step, we use the key that identifies an instance, in this case, the UUID. This is transferred from the original view, as we saw above in the URL data. Now let's perform a mapping of the ID, the only field we allow.

If we now perform the navigation on our partner, we land on the object page in our target app using precisely this key. Basically, we would have the option to edit here if this were active, and would immediately see all the data for this specific sale at a glance.
Semantic Key
Basically, we are not limited to the unique key method, but can also use the semantic key to perform navigation. However, it is important that we then receive exactly one entry as a result. To do this, we define a semantic key in the Consumption View of the target app and define the partner and the sale date as the semantic key.
@ObjectModel.semanticKey: [ 'Partner', 'SalesDate' ]
define root view entity ZBS_C_NavigationTarget
We now transfer this mapping to the navigation parameters to address precisely these two pieces of information. If we now go to the Sales App and perform the navigation, we also land on the object page of our target application. Navigation via the semantic key therefore works in the same way to access the object page and does not bind us to the actual key of the instance.

Manifest
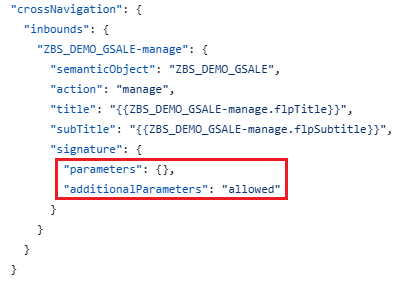
If you wish to configure the settings prior to deployment or if no App Descriptor item is available in your system, you can perform the configuration directly within the manifest.json file. This node becomes available when you generate the Fiori Launchpad configuration during the generation process. You will find the parameters and configuration settings required for adjustments within the SIGNATURE section. However, this approach requires modifying the artifact and performing a new deployment each time a change is made, for this reason, we did not explore this method in greater detail in this article.
Complete Example
You can find the complete example in the package ZBS_DEMO_RAP_NAVIGATION, where the app was created as a projection on the Sales App from REX7 to provide a simple example. In the GitHub repository you will find all the source code and examples. In this Commit you will find the modified and generated resources.
Conclusion
Is the navigation not working as you expected? Are you not landing on the object page or are the wrong filters being applied? Then you should consider using navigation parameters to make adjustments to the app's handling. You can then define, via the various settings, which parameters are accepted, which are ignored, and which are remapped.

