Fiori for ABAP - Deployment
What about the deployment of our Fiori application? Let's take a detailed look at various settings and make the app available.

Table of contents
In this article, we'll examine the deployment and various settings within our application. Finally, we'll make the application available in the Launchpad.
Introduction
So far, we've primarily worked with the preview in the Business Application Studio and looked at our Sales App using the standard tools. However, an important component was the actual deployment in the ABAP system and in the real Launchpad, in order to make the application available to our business department. Several steps within the configuration are necessary to later perform a deployment.
Creation
Here we present the various settings that are needed to perform the deployment. There are currently three ways to do this: manual creation, via the Application Information and creation via the actual Fiori Wizard (SAP Fiori generator) when creating the project.
Wizard
In the project attributes, we can decide whether to define the deployment configuration directly when creating the project. The options are displayed as checkboxes and must be actively activated.

If you have activated the radio button, you will have an additional step in the project generation process. Here you'll find the various fields and information you provide to the system for configuration. We'll take a closer look at the different settings in the actual file shortly.
Application Information
Right-clicking on the webapp directory will also display the Application Information. When you launch this, it's an overview page that gives us initial impressions of the application, such as which UI5 version is used, which service is available, and which different pages exist in the project.

At the bottom, you'll also find various settings where you can recreate configurations like the Launchpad configuration or a deployment configuration. Clicking the Add button restarts the wizard and creates the file accordingly in the directory. A simple and clean way to recreate missed configurations.

Manual
Of course, you can also create the file manually. To do this, simply create the file "ui5-deploy.yaml" in the project's root directory and configure the corresponding settings in the project. Further information about the template can be found in the SAP Help. We generally recommend creating the file directly when generating the project, as this is the easiest way to ensure the correct structure.
Hint: Therefore, it's best to use the various wizards to create the file. This ensures that the configuration meets the requirements.
File
In the ui5-deploy.yaml file, you will find the actual settings for deployment to your respective system. You should normally also save this file in the project directory so that your colleagues have all the information about which artifact and system it was deployed to.
YAML
YAML is a special format for configuring services and build pipelines in other services. The various terms, keywords, and settings are arranged vertically with corresponding indentations. No trailing characters are used; instead, the configuration is written directly from top to bottom. The corresponding indentations indicate that these components belong to the parent, higher-level component. Furthermore, there are different nomenclatures for fields and lists within the file.
Content
Let's take a look at the file at a glance. Here you will find the typical structure of a YAML file and certain components that were automatically generated in this file. In the next section, we will look at the specific parts that are of more interest to us.
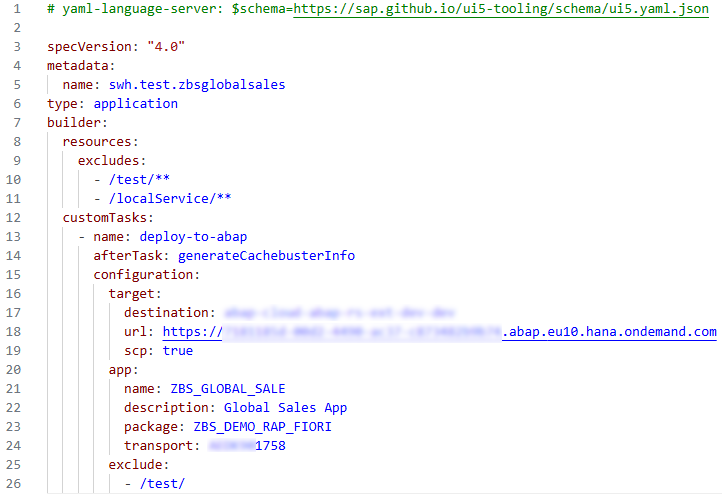
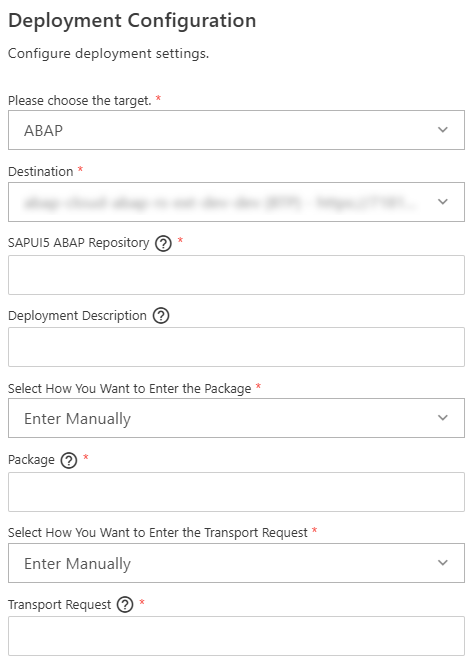
Below "Configuration" you will find the settings for deploying the project:
- target - Here you will find the settings for the target system. The corresponding destination is specified via the Destination Service, followed by the target system. In this case, we are deploying to an ABAP system. Under URL we find the actual system, in this case an ABAP Environment located in the BTP. The flag "scp" This also indicates that it is a system within the BTP.
- app - In the application section, you will find settings for the deployed artifact, the target package, and the transport with the actual description. "name" is the actual ABAP artifact, which is created later in the system and contains the corresponding description. We create the artifact in a specific package, which we specify under "package". For "transport", we do not enter the task here, but the transport itself. During deployment, the artifact is then attached to the corresponding transport.
- exclude - In the exclude section, we remove certain resources that we do not want to deploy to the system, such as all test artifacts for Fiori development. We can back these up later with GitHub, but we don't need to put them into an ABAP system, as they are not required at runtime.
Process
Now let's carry out the actual deployment of our application to create the BSP application in the ABAP system.
Application Information
In the Application Information section, as described above, you will also find additional options for automated tasks within the project. For example, you will find a button there that takes over the deployment (Deploy) for us. The deployment only works if we have already created a corresponding deployment configuration.

The next step starts the console and performs the actual deployment of the application. Before this happens, the artifacts are built and prepared for deployment. In the next step, we are asked if we really want to perform the deployment and receive a short summary of the various points. We confirm this with "Yes", and the actual deployment is performed on the system. Once the deployment has been performed, we should find our BSP application on the system. It's also possible that you'll receive an error message during the process due to a missing configuration, but the app will still be created.

Permissions
After the artifact has been deployed to the system, we need to create a Launchpad App Descriptor Item to prepare the corresponding Fiori configuration for the Launchpad. We can generate this either via our application or, as in our case, directly in the system. Further information on the setup can be found in this article.

Subsequently, we need to assign our application to our IAM app. We then assign the IAM app to a business catalog, and we can then assign ourselves a role in the business catalog to obtain the necessary permissions in the system. Further information on the setup and permissions can be found in an older article on this topic. You can also find information on YouTube if you want to watch a tutorial on how we performed the deployment and authorized the corresponding applications.
Test
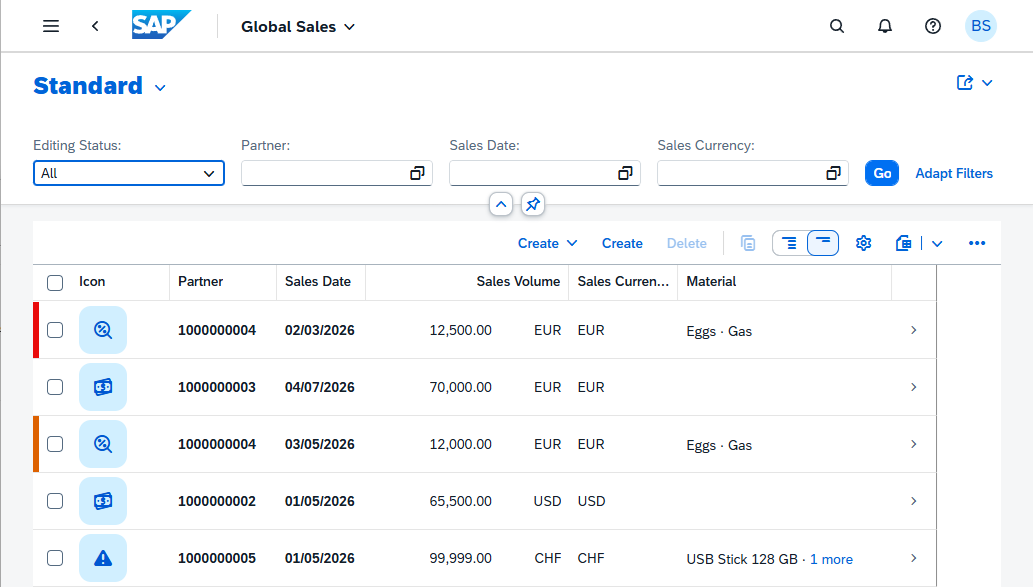
Now that we have successfully created all the settings in the system, authorized and assigned the role, we can find our actual application in the Launchpad. We can find the corresponding tile via the App Finder, since we haven't currently assigned it to a space, and then start our application in the system.

You should now find the same application that we already saw in the preview in the Business Application Studio. With that, we have completed the deployment and the application can now be authorized as normal.
Conclusion
For deployment, we need a corresponding configuration, which we create in our Fiori project, either directly at the start during generation or later, before we carry out the deployment. The build and deployment ensure that a corresponding BSP application is made available on the ABAP system, which we can then make known via the corresponding settings in the launchpad, so that our end users can also access the application.