Fiori for ABAP - Change Documents
How can we display the change records in our application that are currently only available in the database? Let's look at another reuse component.

Table of contents
In this article, we'll look at how to integrate change documents into our existing Fiori application. We'll be using a reuse component.
Introduction
So far, we've discussed change documents in various articles. In the first step, we implemented the change documents, and in the second step, we made them available within an ABAP application and tested them in our own application. Therefore, it's time to display the change documents in our Sales App so that users can see them. SAP currently provides a reuse component for this purpose, which, like the application logs, we can integrate into our Fiori application.
Extension
However, the steps are not as simple as with the application log. Here, we also have to create a new custom section in order to include it via a fragment and a controller extension.
Library
In the first step, we extend the manifest.json file and add a new library under the "libs" node. Similar to the application logs, a component is also added here for change documents.
"libs": {

  "sap.nw.core.changedocs.lib.reuse": {
    "lazy": true
  }
}
Custom Section
As the next step, we need to add a custom section. We can add this via the page map, as we did in a previous article. To do this, we switch to the page map and add a Custom Section, in this case directly after the admin area.

Next, we open the fragment and can make adjustments there. To do this, we take the ComponentContainer and give it a corresponding ID. You can assign this ID however you like, just remember it for later. Otherwise, we don't need to make any further adjustments here.
<core:FragmentDefinition xmlns:core="sap.ui.core" xmlns="sap.m" xmlns:macros="sap.fe.macros">
    <core:ComponentContainer id="idChangeContainer"/>
</core:FragmentDefinition>
Controller Extension
Next, we need to implement a controller extension for the object page. The easiest way to do this without having to do it manually is again via the page map. To do this, open the page map and stay at the top level. On the right side, you will find an entry in the menu to create the controller extension. This creates the extension, i.e., a file, and registers the corresponding controller.

In the controller, we give the extension a name. This name will then be used for the file that is implemented. Accordingly, we want to create a new controller and not reuse an existing one; besides, we don't currently have an additional one in the project.

Implementation
You can also find this huge code snippet in the official SAP documentation. It's the complete implementation of the controller in the corresponding extension. Copying it will be quite difficult, however, as we have to adjust many things to adapt the controller to our specification and our application. If you use the code as a template, you should definitely save the path within the "Extend" file, because the controller extension is linked there under the name we assigned.
sap.ui.define(['sap/ui/core/mvc/ControllerExtension', 'sap/ui/core/Core'], function (ControllerExtension, Core) {
    'use strict';

    return ControllerExtension.extend('swh.test.zbsglobalsales.ext.controller.ChangeDocumentExtension', {
        _chdContainer: "swh.test.zbsglobalsales::SASaleObjectPage--fe::CustomSubSection::ChangeDocument--idChangeContainer",

        override: {
            /**
             * Called when a controller is instantiated and its View controls
             * (if available) are already created.
             * Can be used to modify the View before it is displayed, to bind
             * event handlers and do other one-time initialization.
             * @memberOf chdbookproject.ext.controller.ChdControllerExt
             */
            onInit: function () {
                var that = this;

                var oViewId = this.getView().getId();
                if (oViewId === "swh.test.zbsglobalsales::SASaleObjectPage") {
                    this._oComp = Core.createComponent({
                        name: "sap.nw.core.changedocs.lib.reuse.changedocscomponent",
                        id: "ChangeDocReuseComponent",
                        settings: {
                            "objectClass": ["ZBS_CO_SALES"],
                            "startDate": "2026-01-01T00:00:00.0000",
                            "stIsAreaVisible": true
                        }
                    });
                    var oChdContainer = Core.byId(this._chdContainer);
                    if (oChdContainer !== undefined) {
                        oChdContainer.setComponent(this._oComp);
                    }

                    this._oComp.setStIsAreaVisible(true);
                    this._oComp.stRefresh();
                }
            },
            editFlow: {
                onAfterSave: function () {
                    var that = this;
                    this._oComp.stRefresh();
                }
            },
            routing: {
                onAfterBinding: function (oBindingContext) {
                    var that = this;
                    oBindingContext.requestProperty("RawChangeID").then(function (sObject) {
                        if (sObject) {
                            that._oComp.setObjectId([sObject]);
                        }

                        that._oComp.stRefresh();
                    });
                }
            },

        }
    });
});
We have adjusted the following points within the code:
- Container name (_chdContainer) - The container name must be reassigned and adapted to your application. The first part consists of the namespace and the application name. This is followed by the name of the object page on which the container is implemented, then the name of the custom section, and finally the name of the actual control. After that comes the ID of our ComponentContainer, which we created in the fragment.
- View ID - Next, we need to adapt the View ID to our application. This is again composed of the namespace and ID of our application, as well as the object page on which the extension was implemented.
- Settings - In the lower part, we then need to adjust the settings. There, we specify our actual change object as the Object Class, under which the changes will later be found. We specify a start date from which the selection should begin. If an application is relatively new in the table, you can set the date to today; otherwise, set it to the date from which your changes should be selected.
- Attribute - In the lower part, we must enter our attribute from the OData service in the Request Property, which is used to identify the change document. We should actually specify the UUID here. However, during debugging, we discovered that it is not passed in the format we need. Therefore, we pass a new field here, which we will create in a later step. Using "RawChangeID", we pass the actual UUID in the correct format to the service so that the data can be read later.
ABAP Environment
Unfortunately, testing the application in the preview is not possible; we receive an error when loading the object page and cannot continue working. Therefore, we must first deploy the application to the ABAP system and can then proceed with the further steps.
Deployment
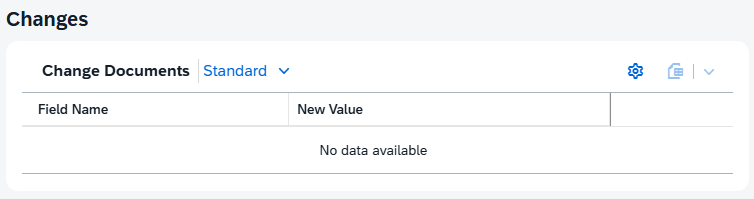
Now let's perform the actual deployment and make the application available again in the ABAP environment. If we now start the application in test mode, the control should be loaded for the first time, but still without data. We are still missing the authorizations, which we will assign in the next step.
Authorizations
Accordingly, we must extend our IAM app again and include the service for the change documents. We need to add an OData v2 service. And don't forget to include the correct number of spaces between the service and version. As a code example, you can find the service code here again to copy:
APS_CHANGE_DOCUMENTS_SRV 0001
After extending the IAM app to adjust permissions, you should click the "Publish" button to make the changes available in the Launchpad.

RawChangeID
As previously mentioned, we currently face a problem: if we were to provide the UUID, it would yield no information when used as an identifier. This is because the UUID is displayed incorrectly within the Fiori applicatio or at least not in the format required by the service to retrieve it from the system. Consequently, we must implement an additional virtual field within the service that exposes the raw ID without any formatting, that is, entirely in uppercase and without hyphens. We then require this information within the service to retrieve the corresponding data.
        @ObjectModel.virtualElementCalculatedBy: 'ABAP:ZCL_BS_DEMO_RAP_SALES_VE'
virtual RawChangeID : abap.char(32),
The implementation here is quite simple: We simply copy the UUID into the new field and that's it. All the changes we made to the service and the implementation can be found in the commit below if you'd like to see them in detail.
To understand the background of the actual change, let's look at the HTTP request in the browser. There we see that the service is being called with the UUID and, consequently, the wrong format is being passed. As a result, we don't receive any change records back from the service. However, if we replace the UUID with our actual ID, which we also find in the database, then we receive a corresponding result from the service. Therefore, we've determined that we need to adjust the ID being passed and change the format.
" UUID
604aadc-c1e5-1fe1-84df-751c01c1157d

" RawChangeID
0604AADCC1E51FE184DF751C01C1157D
Test
Now that all changes are in place, we can perform the actual test again. To do this, we call up our application and go to a data record. Here we can make the corresponding changes and then see that corresponding change logs are written. We also see the modifier, the date, the time, and which field information has changed. The control is now successfully implemented in our application, and we should no longer have any errors.

Outlook
For Release 2608, it has already been announced that the Core Data Services will be officially released for the change documents and will thus receive a C1 contract for use in ABAP Cloud. This should reduce the complexity of the implementation somewhat. We can then later model the Core Data Services directly in our RAP object and display them via an annotation, without having to go through the Reuse component, which is currently very complicated to implement.
Complete Example
You can find the saved resources for our application in our GitHub repository. This will allow you to track all future changes to the Fiori app or use the resources for deployment. You can find the current changes in this Commit. The changes on the ABAP side can be found in this Commit.
Conclusion
Implementing the component is not really easy; there are many points to consider to ensure that the application still loads cleanly and displays the content we want to see. Basically, this was the most difficult component so far, and many points had to be adjusted and considered.
Further information:
SAP Help - Reuse Library for Change Documents
SAP Help - Fiori Elements Integration OData v4