Fiori for ABAP - Changing archived apps
Once work on a Fiori app is complete, it's stored in a Git repository for future access. Let's look at the process for reloading and modifying the project in more detail.

Table of contents
In this article, we'll look at how to reload a saved app from the GitHub repository, customize it, and then save it again.
Introduction
Up to now, we've made all customizations to our Sales App in a local repository that was already present in the Business Application Studio. Normally, however, when we complete a project, we back up the repository using Git and then delete it from the workspace. This has the advantage that if a colleague makes a change later, we don't automatically continue working on an outdated version or revert changes.
Therefore, we start here with an empty project directory, into which we will immediately load our application, make adjustments, create a deployment, and back everything up again via Git to simulate the lifecycle.

Clone
In the first step, we cloned the project from a Git repository into our local editor. For this, we need the corresponding URL of the repository. You can find this in the directory via the code button and copy the URL there. If you are working with a remote Git repository accessible via the Cloud Connector, you should adjust the URL so that the correct destination to the Cloud Connector is found.

Use CTRL + SHIFT + P to search for the command to clone your repository and paste the URL to start the cloning process.

Once the cloning process is complete, you should find a new directory under your projects containing the files from the repository, as well as any changes you have made previously. This allows you to ensure in the first step that the cloning was successful and that all necessary files are present for a later deployment.

When you clone, you are usually also asked what you want to do with the cloned repository. You can open it as a separate workspace, which means the folder will be defined as the root folder on the left, or you can integrate it into the existing workspace. Since we have already loaded projects, we can also simply click "Cancel". Press and remain in the same view.

Process
The process describes the changes you make, but also things and tools that are available to you to work with the saved state.
Difference
You may have already noticed some differences if you are working locally. For example, the "node_modules" folder is missing. This was not backed up with Git, but is located in the ".gitignore" file. This is mainly because the various modules from npm are automatically installed as soon as the build process in your project is running, so you always have access to the latest resources and patch levels. These modules don't need to be backed up manually, as they are available via the npm registry anyway and are only needed to build the application, usually in a current version.

Change
You can make all changes as usual. Here, for example, we'll adjust the "manifest.json" file and modify two tags. In the "i18n" file, we adjust one translation at a time to make changes to our application. You can make all other changes as usual, just as you would in SAP Business Application Studio when creating new applications.

As you can see above, the changes are also highlighted within the editor. In the workspace, you will also see modified files or newly added files that differ from the last commit.
Undoing changes
If you go to the Source Control tool, you will find all the modified files that you have changed within the repository since the last commit. This way you always maintain an overview of which files have been changed and what the changes look like.

If you then click on one of the changed files, you will land in a view where you can compare the changes. Here, for example, we can see which two texts we changed in which line, giving us the opportunity to conduct a review or undo changes we may have made only for testing purposes.

Do you want to revert an entire file to its original state because, for example, you made many changes for testing? Then you'll find a button for this when you hover your mouse over the respective file. This allows you to completely reset the state without having to manually edit the changes in the Source Control. or to undo the file.

Deployment
If you open the Application Info, you will receive an error message stating that the "node_modules" have not yet been installed. A command for the terminal will be offered for this. However, this is only necessary if you want to start the application directly via the preview. In this case, we only need to perform one deployment, since our changes are very minimal and we don't want to start the application via the Business Application Studio.

If the "ui5-deploy.yaml" file was already synchronized in the project, you can start a deployment directly. Of course, you should also adjust the transport request, as it has likely changed. If the deployment configuration wasn't backed up, as in our case, you'll need to create a new one. If you still run the deployment, the wizard will start automatically, where you should specify information such as the repository, package, and transport request. Here you should use the same information with which the artifact was already deployed to the system. The best way to find this information is to look in the corresponding package within the system. Finally, the deployment of the modified version should complete successfully.

Backup
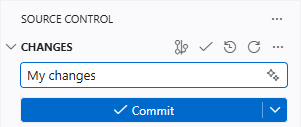
Once you have made your changes and the deployment was successful, you should of course remember to back up the resources as well. To do this, you can go to the Source Control tool, enter a message using the Commit button, perform the commit to confirm the local repository, and then perform the sync to bring the changes to the remote repository. This completes the backup process, and you can delete the project from your workspace.
Complete Example
You can find the saved resources for our application in our GitHub repository. This will allow you to track all future changes to the Fiori app or use the resources for a deployment. You can find the changes in this Commit.
Conclusion
Working with the tools and Git is particularly important here, especially if you have cloned applications or are working on repositories created by a colleague. Loading, modifying, deploying, and saving again is an important part of the work and a fundamental aspect of working with Fiori. Here you cannot work directly on the same resources as you might in ABAP.