BTP - Restriction Type
Granting authorizations in the ABAP environment via an IAM app is quick and easy, but what about maintaining elements dynamically for each business role? Let's look at the different options and the distinction between write and read permissions.

Table of contents
In this article, we'll look at the distinction between Restriction Types and how they interact with authorization objects. We'll dynamically assign authorizations via Business Roles.
Introduction
In the last article, we extended our Sales App and restricted authorizations at the Core Data Service level. We created a classic authorization object, which we then queried in the Core Data Service via the Access Control. A further step, however, is to dynamically manage permissions within the actual user role, so that the permissions administrator has the ability to restrict the values via the UI and not just via the development objects.
Challenge
We assign the actual permissions in the IAM app. There is a tab for "Authorizations" where we can enter our actual permission object and define values to establish restrictions. However, in most cases these values are static and tied to this IAM app, and do not allow further maintenance by the permissions administrator.

If we activate the IAM app and then restart the Core Data Service, we now receive all data records that correspond to this business partner. This is because this IAM app is assigned to a business catalog, the business catalog to a business role, and this role has already been assigned to our user master record. This automatically grants us the permission we entered here.
Restriction Field
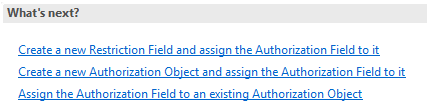
You may have noticed this dialog last time, as below the permission field we find further links that can trigger additional actions. We need one of these actions, namely the creation and assignment of a Restriction Field. So we want to create a new Restriction Field and directly assign our authorization field to it.
However, we will receive an error message in the first step when we try to complete the wizard. This indicates missing metadata. This could be because our table, which is supposed to create our value help, is not defined correctly. We have specified a data element in the authorization field, which the system now also expects as a key field in order to use the values for the assignment. Therefore, we need to go back to the target table, in this case our partner table, and change the data element of the key field from CHAR10 to the data element.
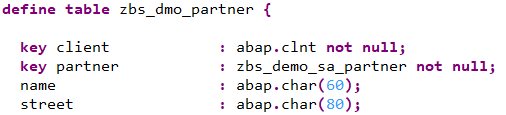
The wizard should now run, create a restriction field for us, and directly assign the authorization object. When we save the object, we can also use the "Search Help" button here and should now receive value help with all our values from the helper table. This ensures that the values can also be selected later in our Fiori application.

Restriction Type
In the next step, we need to create a Restriction Type, which corresponds to the authorization object. In this chapter, we will go through the creation and assignment process in detail.
Creation
The Restriction Type can be created via the normal creation process, or we can again use the link in the authorization object. In this case, we clicked this link, and a Restriction Type is automatically created and the corresponding authorization object is assigned. It is also automatically detected that there are already Restriction Fields, which are then automatically assigned to the object as well. Thus, all information is present within the object, and we can publish the object in the system using the "Publish Locally" button.

An assignment of the Activity field (ACTVT) is not necessary here. This is controlled by the framework, as is the assignment of authorizations and individual values. This has the advantage that it is a standard element used in almost every authorization object.
Assignment
Now we need to assign the Restriction Type according to the Business Catalog so that we can perform the maintenance later. In the "Restriction Types" tab, you will find a button called "Propose Restriction Types...". You can click this and receive a suggestion for all Restriction Types that are available for the respective IAM apps. The information is derived from the authorization object used. Accordingly, the tool checks the system to see which authorization objects are assigned to the individual IAM apps, determines the additional restriction types, and offers them here in the dialog.
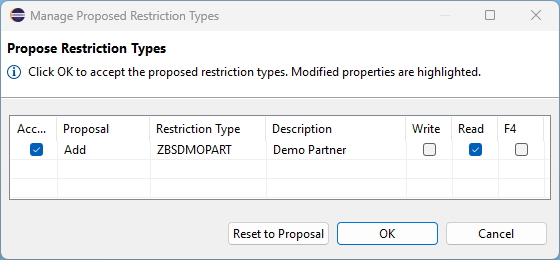
We confirm the restriction type so that it is listed below, and check the boxes for Write and Value Help, as we want to manage this setting later via the role. Once you have finished managing the settings, you must click "Publish Locally" again. Perform the changes so that they are made available in the Launchpad.

Test
In this chapter, we will perform the change, maintain our permissions in the Launchpad, and finally review the data in our app.
Maintenance
To do this, we go to our Business Role, which we already created in a previous article, to maintain the permissions. It is important that the Business Catalog is also assigned to the corresponding IAM app so that Restriction Types can be applied. First, we need to change the Access Categories at the role level to "Restricted" so we can restrict access. "Unrestricted," for example, means we have a star rating everywhere and therefore access to everything.

At the top, you'll find "Maintain Restrictions". Clicking this button takes you to a new page where you can make changes. Here, you can also see the Access Categories that have been set to "Restricted". At the bottom, you'll see all the assigned Restriction Types that you can manage. In the middle, you'll see the two different conditions; here, you can control access. On the right side, you'll see the selection options when we're in edit mode. In the upper section, you can set it to Restricted or Unrestricted to define, for example, a wildcard. Or you can select the values from the list below. Ranges are also possible, but we haven't activated them in the object. This is done in the Restriction Type.

These are just examples for unrestricted access. We typically maintain both values for two business partners each, which we'll then see and manage later in the application. Because, fundamentally, the setting at the top for Read and Write overrides the setting below, which only includes Read. If we were to then set permission for everything at the top, Read access for everything would automatically be possible as well.
App
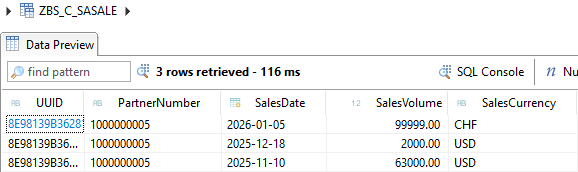
Now, if we go to our Fiori app Global Sales and press "Go" to load the data, only three data sets are loaded at a time. This corresponds to the data sets for which we have permission to view. We have thus overridden the setting from the IAM app and replaced it with our Restriction Type, so that we can see the two maintained business partners.

Read or Write
How is the difference between Read and Write activities actually determined, since we don't maintain them in the Business Role? Basically, this setting comes from the Activity, in this case from the authorization object. There, we defined which activities are available for the authorization object. We can also override the Access Categories that are set as default there. For example, we see in the list that 03 is output as a Read activity and 01, 02, and 06 are each output as Write. In edit mode, we would have the option here, for example, to set activity 06 to "Read," which wouldn't make sense at first, but is fundamentally possible in order to assign the different activities to the categories.

Complete Example
You can find the complete example in GitHub in the corresponding package for the Sales App. The changes from this article can be found in this Commit and you can follow the changes, plus the additional information.
Conclusion
Restriction types are important if we want to dynamically manage and assign permissions via the Launchpad. This gives the permissions administrator the ability to assign different business partners to different roles, so that a user who might be an admin can see everything, but the different users in the different groups only have access to different business partners. However, this is not dependent on a backend object, but can be dynamically maintained via the UI.