RAP - Native File Upload
Do you want to upload a file to your RAP application and then process it? The official solution for uploading and downloading is still pending, but it's already possible today with a small workaround.

Table of contents
In this article, we'll look at a native upload that you can implement without Fiori Elements and that even works in the preview.
Introduction
So far, we've extended our Sales App with various actions and last time looked at our topic Feature Controls to enable or disable various functions, depending on the current user's permissions. In a previous article, we also looked at how we can enrich our entity with new data via native Excel upload without actually having to implement anything in the JavaScript framework or ABAP. Occasionally, however, we might need a native upload to, for example, upload various text formats, raw files, or images that we don't want to save but perhaps process directly.
The official SAP solution will take some more time. This will allow for the upload and download of generic files without requiring any specific implementation. This solution is more of a workaround, as it requires creating a large number of objects to achieve the desired result.
Popup
In this chapter, we describe the implementation you need to make to create a popup that allows file uploads.
Architecture
Our architecture therefore consists of two layers of objects. At the top level, we have the popup that is ultimately presented to the user. For this, we need an additional association to the files, which is necessary for file uploads. For each of the two abstract entities, we then need a behavior definition in which we define the behavior and the relationship between the entities. This then forms the basis for using the structure as a parameter in an action within our RAP object.

File
In the first step, we define the entity for the actual file. We use the three typical fields that we also need for the classic upload directly into the entity: the actual file, the MIME type, and the filename. Here you should ensure that the entity is defined as a ROOT entity, as we need to define a behavior for it.
@EndUserText.label: 'File Upload Entity'
define root abstract entity ZBS_S_SAFileUpload
{
  @Semantics.largeObject: {
    mimeType : 'MimeType',
    fileName : 'Filename'
  }
  Attachment : abap.rawstring;
  @Semantics.mimeType: true
  @UI.hidden : true
  MimeType   : abap.char(128);
  @UI.hidden : true
  Filename   : abap.char(128);
}
On this abstract entity, we then define a behavior. You can do this by right-clicking on the object and selecting the context menu. Basically, we only need to define the addition WITH HIERARCHY here; otherwise, we don't need to make any further adjustments to the definition.
abstract;
strict ( 2 );
with hierarchy;

define behavior for ZBS_S_SAFileUpload
{
}
Dialog
Now we define the entity for the actual popup that the user ultimately receives for input. The important aspect for the file upload is the corresponding association, which we create in the lower part. The name of the actual association is irrelevant. We reference the file upload, the entity we created in the first step, with a one-to-one association. We also define the abstract entity as ROOT, since we also need to create a behavior definition for this object. We can freely define the fields in the upper part. If we have further input information that the user can provide, we have the option to define additional fields here.
@EndUserText.label: 'Flat File Upload Dialog'
define root abstract entity ZBS_S_SAPopupFlatFile
{
  @EndUserText.label: 'Description'
  Description : abap.char(60);

  @EndUserText.label: 'Test Mode'
  TestMode    : abap_boolean;

  @EndUserText.label: 'File Name'
  _Files      : association [1] to ZBS_S_SAFileUpload on 1 = 1;
}
We now create the behavior definition for the object. Here we must again use the WITH HIERARCHY addition and ensure that the association we define in the entity also has this addition. Otherwise, the field will not be generated in the entity and will not be visible.
abstract;
strict ( 2 );
with hierarchy;

define behavior for ZBS_S_SAPopupFlatFile
{
  association _Files with hierarchy;
}
Implementation
In any case, there is one special feature in the implementation of the method. Here we not only use the PARAMETER modifier, but also DEEP PARAMETER, so that the deep structure of our popup is used.
static action UploadFlatFile deep parameter ZBS_S_SAPopupFlatFile;
For further testing purposes, we then define a conversion logic in the actual method that takes the keys we received, takes the attachment there, and converts it from XSTRING to STRING so that we can read the content later in the test.
LOOP AT keys INTO FINAL(key).
  FINAL(file_content) = xco_cp=>xstring( key-%param-_files-Attachment )->as_string(
      xco_cp_character=>code_page->utf_8 ).

ENDLOOP.
Test
Before we go into the test, you should propagate the action to the consumption layer so that it is available there, and display it in the UI via the metadata. We have omitted these steps from the article, but you can find them in the GitHub repository.
Text file
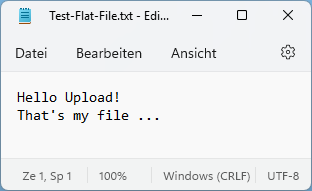
For the test, we prepare a normal TXT file, which we create in a text editor. We also insert a separator (ENTER) between the two lines and save the whole thing as UTF-8 on our drive.
Dialog
When we then execute the action in the UI, we get the popup we defined. The two additional fields for the description and the test mode are in the upper area; below them are the attachments, where we also automatically get value help. We can define the order of the fields to a certain extent, but the actual association is always generated at the very bottom of the popup. You shouldn't be distracted by the visualization; only one file can be uploaded at a time.

Debugger
Once we start the debugger, we can view the contents of the passed-over structures. In the key, under parameters, we find the respective settings from the popup: the description, the test mode, and the association to files. This corresponds to the name of the association as we defined it in the abstract Core Data Service. The three fields for file upload are also included and have been populated with our file and its values.

Notes
Since this is a workaround, there are naturally some points you should consider when implementing such a solution:
- Default Function - A default function cannot be implemented for our action. We cannot set default values when the user opens the popup. This is currently not supported by the DEEP PARAMETERS we implemented to enable file uploads.
- Number - As we mentioned earlier in the article, you can only upload one file at a time using this function. Batch uploads of multiple files are not possible, for example, to add several attachments.
- UI Annotations - You can customize the UI annotations within the popup, but only for all other fields. The Attachment field is retrieved from the sub-entity based on its name. The name we gave it via the UI annotation is not used here.
Complete Example
You can find the complete example in GitHub in the corresponding package for the Sales App. The changes from this article can be found in this Commit and you can use it to understand the changes, plus the additional information.
Conclusion
In principle, native uploading with built-in ABAP tools is already possible today. This allows you to load Excel files directly into ABAP and parse and insert them using the XCO libraries. Basically, you can also use reuse components directly in Fiori, which already have various validation logics without having to implement additional logic in your application.