RAP - Tree View
Want to easily display a hierarchy in RAP? Learn how to do it in ABAP Cloud in this article.

Table of contents
In an earlier article, we introduced you to the hierarchy in Core Data Services. In this article, we use the hierarchy to represent a tree in Fiori Elements.
Introduction
Hierarchies are widely used in SAP because they can be used to represent relationships between objects. This allows connections between objects to be visually represented. Previously, this was possible in ABAP using Core Data Services, and the tree view was also widely used in GUI development. We also find a corresponding alternative in the ABAP RESTful Application Programming Model (RAP), which we will discuss in detail today.
Preparation
In the first step, we use the database table ZBS_DMO_TEAM from the article for the Custom Data Browser. There you will find further information about the table and the data to be populated. To use the RAP Generator, we will extend the table with some technical fields for RAP. You can find these in the Code Snippets.
local_created_by      : abp_creation_user;
local_last_changed_by : abp_locinst_lastchange_user;
local_last_changed    : abp_locinst_lastchange_tstmpl;
last_changed          : abp_lastchange_tstmpl;
Using the table, we can start the RAP Generator to generate our RAP object. In the Project Explorer, you can find the generator in the context menu by right-clicking on the object.

In the next step, we want to generate an OData v4 UI service, so we also need the technical fields in the table.

In the next step, we can give the objects their own names or confirm the default. Many companies have their own naming convention for Core Data Services, so renaming will always occur.

After the selection, generating the objects takes a moment. Once the generator is finished, you should now find more objects in the package.

Preview
To start a first preview, we still need to create the service binding "ZBS_UI_DEMO_TREE_TEAM_O4" in the package via Publish.

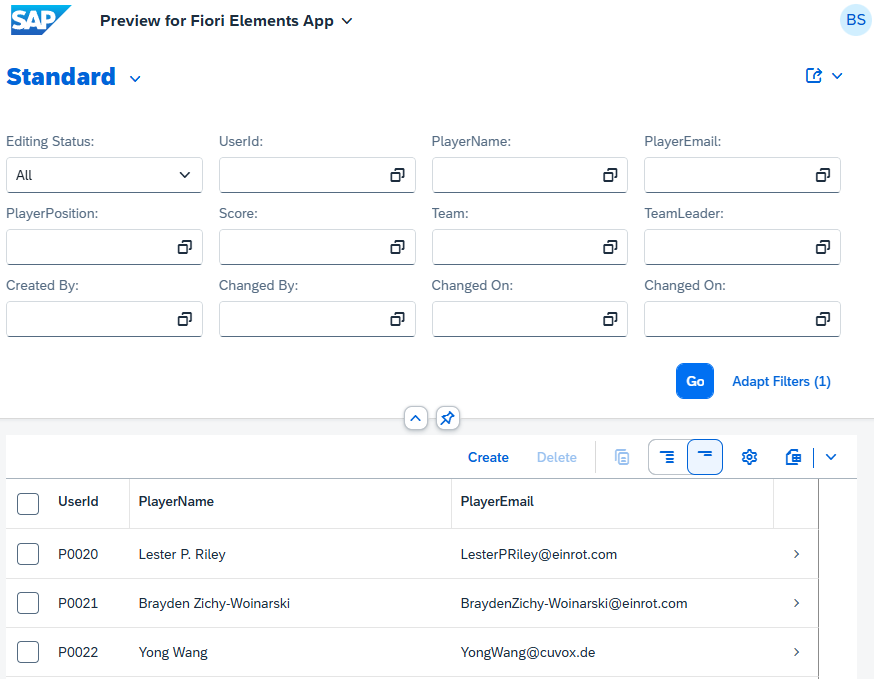
This may also take a moment, then the service is available. By selecting the entity and clicking the "Preview" button, we start the preview of our app and get a first impression of a normal RAP application.
Tree View
In the next step, we want to extend the application to implement the Tree View. To do this, we need some additional information and must extend our entity.
Interface View
First, we extend the root view of our RAP object "ZBS_R_DMOTreeTeam" and create an association to itself. This defines the relationship between the current record and its parent record. Finally, don't forget to publish the association in the view.
association of many to one ZBS_R_DMOTreeTeam as _TeamLeader on $projection.TeamLeader = _TeamLeader.UserId
Hierarchy
In the second step, we need a hierarchy so that the app can later build the hierarchy using the tree. To do this, we define the hierarchy on our root view and use the created self-association "_TeamLeader" to create the hierarchy. The hierarchy should start with all members who do not have their own team lead, sorted in ascending order by name.
define hierarchy ZBS_I_DMOTreeTeamHR
  as parent child hierarchy(
    source ZBS_R_DMOTreeTeam
    child to parent association _TeamLeader
    start where
      TeamLeader is initial
    siblings order by
      PlayerName ascending
  )
{
  key UserId,
      TeamLeader
}
Hint: The hierarchy key must match the key of our RAP object.
Consumption View
In the "ZBS_C_DMOTreeTeam" consumption view, we still need to declare the relationship to the hierarchy. To do this, we use the "OData.hierarchy.recursiveHierarchy" annotation and pass the hierarchy created in the previous step.
@OData.hierarchy.recursiveHierarchy:[{ entity.name: 'ZBS_I_DMOTreeTeamHR' }]
We also need to create a self-association in the consumption view and publish it in the view. This is required for the assignment. Otherwise, you would also receive an error message in the service binding.
association of many to one ZBS_C_DMOTreeTeam as _TeamLeader on $projection.TeamLeader = _TeamLeader.UserId
Test
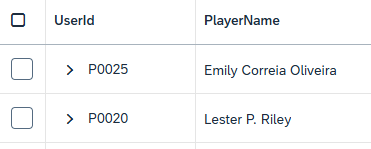
Our application is now complete and we can start testing. You can check the service binding to see if there are any errors with the hierarchy or the data. After the first start, we get a new view; we only find two records: our actual team leaders.

In the menu; You'll also find new actions that allow you to expand or collapse the tree, in addition to the standard actions.

If we expand the tree, the hierarchy is displayed using the user ID, and we can recognize a tree. We can always control the fields in the rear section using annotations. As you can see from the last part of the line, we can also jump to the object page via the navigation.

If we use the filters in the upper part and search for a user ID, for example, then our result is loaded, as are the relationships above it.

Width
The width of the key field may be too small in its initial state, and we cannot immediately recognize the hierarchy clearly. This doesn't necessarily make things easier for the user, as they'll likely have to increase the column width.

If you want a wider column upon loading, you can use the "cssDefault.width" annotation on the LineItem to increase the initial width. You can actually use any standard CSS unit here. In our example, we're using pixels (px).
@UI.lineItem: [ {
  position: 10 ,
  label: 'UserId',
  cssDefault.width: '150px'
} ]
If we then reload the application, the column will now load with a new width and does not need to be manually enlarged.
Complete example
You can find the example shown on our GitHub and can take a look at all the changes from this article in the commit Since the table comes from the Core Data Services area, you can find the changes to the corresponding repository in this commit.
Conclusion
In just a few steps, a table can be converted into a hierarchy. This works with the main list on the List Page, but also with a list on the Object Page. This will allow you to easily display hierarchies using Fiori Elements in the future.