RAP - Generator (ADT)
Today, let's take a look at the RAP Generator, which is already integrated into ABAP Development Tools, and how you can use it to easily build new RAP apps.

Table of contents
Creating RAP applications by hand and building the individual objects can take a lot of time. In this article, you will learn more about RAP Generator and how it can increase your app building speed.
Introduction
So far we have mainly created RAP objects by hand and repeatedly built the stack manually. This method is ideal for learning to get to know the different objects and how they are used. But once you know all the basics, it's time to speed up the development. There are two different RAP generators for this, the one integrated into the ADTs and the Fiori Elements application, which you first have to install in the system. In this article we will introduce you to the generator from the ADT.
Table
The development therefore starts with the table that we need to provide to the generator. Here you should already have created all the necessary data elements that you will need later for the definition and the texts of the application. In addition, two mandatory fields must be provided, these can be located at the end of the table.
local_last_changed : abp_locinst_lastchange_tstmpl;
last_changed       : abp_lastchange_tstmpl;
The fields are needed for the ban and the draft, and the dialog will ask for them later if you forgot them. For the following example we define the following table in the system:
@EndUserText.label : 'Easy RAP Generator'
define table zbs_dmo_gen1 {
  key client         : abap.clnt not null;
  key uuid_key       : zbs_demo_key not null;
  description        : zbs_demo_description;
  @Semantics.amount.currencyCode : 'zbs_dmo_gen1.currency'
  price              : zbs_demo_price;
  currency           : abap.cuky;
  local_last_changed : abp_locinst_lastchange_tstmpl;
  last_changed       : abp_lastchange_tstmpl;
}
Generator
You call up the generator via the context menu of the table. With the point "Generate ABAP Repository Objects ..." you can now start this for the selected table.

On the next picture different generators are offered for different scenarios. If you want to generate something for RAP, you can use the UI and the API Generator. If you want to do more configuration and table maintenance, you can use the maintenance generator here. But we continue with the UI Generator for RAP.

In the next picture we just have to confirm the package, by default the package of the table is proposed here. As long as we don't deviate from the standard, we can skip this picture. In the next picture we configure the objects to be created and influence the names.

Accordingly, we now have to navigate through the various points of the tree and fill in the fields with information. The item "General" looks like this.

Under the item "Data Model" we define the name of the root entity and the assigned alias. This alias can later be used for access via EML.

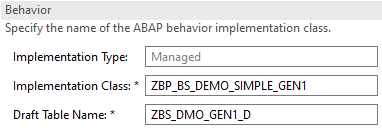
In the "Behavior" section everything is defined with the behavior, the class for the behavior implementation and the name of the draft table. The Managed scenario is also preassigned, but cannot be changed.
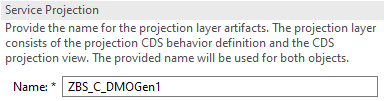
With the "Service Projection" only the name of the projection view has to be defined, the system makes a corresponding suggestion, but can also be overwritten to match your conventions.
Under "Service Definition" the actual service is defined without a protocol, under the service all required core data services are released.
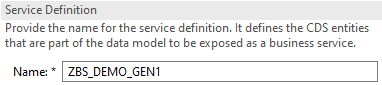
At the last point "Service Binding" you have to assign the name for the service.

At the end you get the list of all objects that are to be generated. Here you have the opportunity to check the naming conventions and objects again.

After completion, the transport is selected and the generation of the objects starts. The generation can take a few seconds because some objects have to be created.
Activation
After all objects have been created, the service binding of the OData service is now opened. Here you only have to click the "Publish" button so that the OData is released and can then also be used.

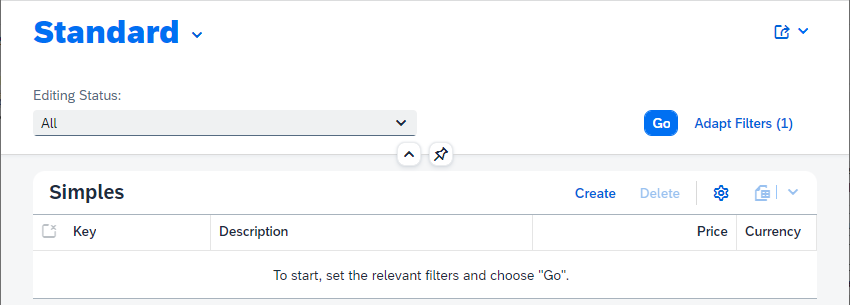
Activation usually takes a little longer, after which we can test our application using the "Preview ..." button.
Objects
We had already named and specified some objects in the generator, but a few more objects were generated. So we automatically got the two behavior definitions and the metadata extension. This saves us defining the output and we can use the demo app directly.
@Metadata.layer: #CORE
@UI: {
  headerInfo: {
    typeName: 'Simple',
    typeNamePlural: 'Simples'
  }
}
annotate view ZBS_C_DMOGEN1 with
{
  @UI.facet: [ {
    id: 'idIdentification',
    type: #IDENTIFICATION_REFERENCE,
    label: 'Simple',
    position: 10
  } ]
  @UI.lineItem: [ {
    position: 10 ,
    importance: #MEDIUM,
    label: ''
  } ]
  @UI.identification: [ {
    position: 10 ,
    label: ''
  } ]
  UuidKey;

  @UI.lineItem: [ {
    position: 20 ,
    importance: #MEDIUM,
    label: ''
  } ]
  @UI.identification: [ {
    position: 20 ,
    label: ''
  } ]
  Description;

  @UI.lineItem: [ {
    position: 30 ,
    importance: #MEDIUM,
    label: ''
  } ]
  @UI.identification: [ {
    position: 30 ,
    label: ''
  } ]
  Price;

  @UI.lineItem: [ {
    position: 40 ,
    importance: #MEDIUM,
    label: 'Currency'
  } ]
  @UI.identification: [ {
    position: 40 ,
    label: 'Currency'
  } ]
  Currency;

  @UI.hidden: true
  LocalLastChanged;
}
Usage
Above all, the RAP Generator saves time when generating the RAP stack, building the umpteenth app manually actually only means hard work. The generator does this work for you, giving you more time for the actual work on the app, such as building the search help, designing the images and the app. You get from the generator:
- Working OData v4 app
- Integrated draft handling
- Ready to use, ready to develop
- Generate a maximum of one entity
However, you should also keep a few things in mind. The generator provides an application once, it is not intended for post-generation. All changes that you then make remain in place and further development then takes place via the developer.
Example
As always, you can find the complete example in our GitHub repository under the corresponding commit, but also in the ZBS_DEMO_RAP_GEN1 package.
Conclusion
The RAP Generator offers you as a RAP expert a quick introduction to the development of new applications and, above all, saves you time when creating the objects in the system. You will be given various standard functionalities that you can use in further development.
Tutorials:
Developers - Generate a RAP Business Service