RAP - Tree View (Deletion behavior)
In this article, we'll look at the behavior of deleting nodes in the tree view using RAP. There are some interesting points to note.

Table of contents
In the last article, we looked at the Tree View display, and there was also a question from Philip Davy about the tree's deletion behavior. In this article, we'll take a closer look at the behavior and try to find a solution.
Introduction
We have currently implemented a tree on our ListPage (entry page) that displays our data as a tree. We can add new entries using the standard RAP functions. If we select entries in the list, we can also remove entries. To do this, we will look at the deletion behavior in detail in this article.
Delete
In this chapter, we will look at the deletion behavior within the tree. To do this, we will go through various scenarios and check against the database.
Individual
In this case, we want to remove a single node without any subnodes. To do this, we select the entry in the tree and delete it using the "Delete" button. Button.

If we now check the data in the database, the entry "P0023" has been removed.

Multiple (one level)
In the next example, we select multiple entries on one level. Again, no root node is affected, and both entries are deleted.
If we check the table, both nodes have been removed from the database.

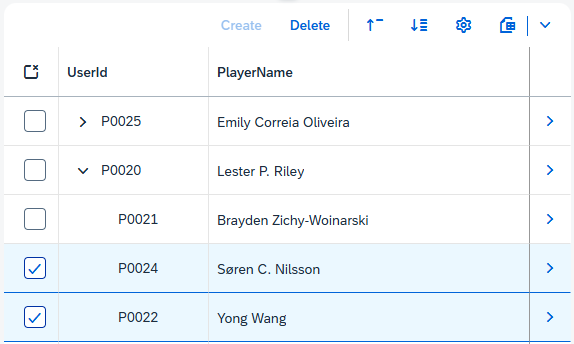
Individual (parent node)
In this example, we delete a parent node that still has a child node (P0021). Once the deletion has been completed, both nodes are no longer visible in the hierarchy.

If we check the database, our parent node has been deleted, but the subnode P0021 still exists (has not been selected).

Multiple (parent nodes)
In the latter case, we select a parent node and several subnodes. In this case, the subnodes are located under our parent node and perform the deletion.
If we check the database, we see that only the parent node has been deleted. The marked subnodes are still in the data.

Assumptions
If you now call up the app, no data is displayed, but the entries that have not been deleted are still in the database. We can now summarize the points above and make an assumption.
- Deleting in the tree without selecting a parent node works like in a normal list report, and the entries are removed from the display and from the database.
- When deleting a parent node, it is removed and the sub-elements are no longer displayed. However, they are not deleted, even if we had actually marked them for deletion.
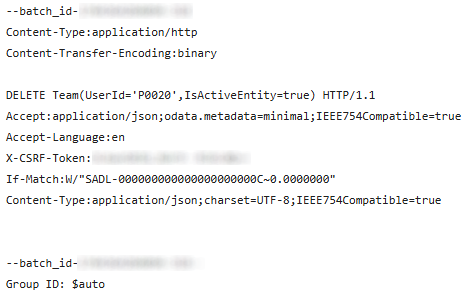
If we look at the second point in the browser, we can see that if we have selected multiple entries and the root, only the parent node is sent in the batch request. The marking of the other entries is therefore ignored.
The ABAP environment and the public cloud now also offer an editable tree, and with it, several more functions. For this purpose, the "with cascading delete" addition can be specified in the association. However, this does not work in our case, since our tree is defined at the root level, and we therefore only receive a warning that this is not currently supported. If you do implement it, you will receive a dump when executing the deletion that points to the lock object's implementation.
Suggested Solution
How can we now implement a general solution for the current behavior? We assume that if we delete the parent node, we also delete the child nodes and, in the second scenario, reassign the nodes.
Additional Save
For this purpose, we implement our own behavior when saving the data. To do this, we define the addition "WITH ADDITIONAL SAVE" in the behavior definition. and let's create the implementation in the behavior implementation (CTRL + 1).
CLASS lsc_zbs_r_dmotreeteam DEFINITION INHERITING FROM cl_abap_behavior_saver.
  PROTECTED SECTION.
    METHODS
      save_modified REDEFINITION.

ENDCLASS.


CLASS lsc_zbs_r_dmotreeteam IMPLEMENTATION.
  METHOD save_modified.
    LOOP AT delete-team INTO DATA(member).
    ENDLOOP.
  ENDMETHOD.
ENDCLASS.
This gives us the opportunity to implement additional behavior when saving the data. Since we are interested in the records to be deleted at this point, the DELETE input parameter is sufficient.
Determination
In the second step, both variants need the ability to read the underlying nodes. To do this, we define a recursive method that allows us to read the underlying tree.
TYPES node  TYPE ZBS_I_DMOTreeTeamHR.
TYPES nodes TYPE SORTED TABLE OF node WITH UNIQUE KEY UserId.

METHODS get_subnodes
  IMPORTING user_id       TYPE ZBS_I_DMOTreeTeamHR-UserId
            recursive     TYPE abap_boolean
  RETURNING VALUE(result) TYPE nodes.
The method reads the hierarchy and searches for all nodes below the currently affected node. If we pass our recursive flag, all subnodes are also searched to obtain the complete hierarchy.
METHOD get_subnodes.
  SELECT FROM ZBS_I_DMOTreeTeamHR
    FIELDS *
    WHERE TeamLeader = @user_id
    INTO TABLE @DATA(subnodes).

  LOOP AT subnodes INTO DATA(subnode).
    INSERT subnode INTO TABLE result.

    IF recursive = abap_true.
      INSERT LINES OF get_subnodes( user_id   = subnode-UserId
                                    recursive = recursive ) INTO TABLE result.
    ENDIF.
  ENDLOOP.
ENDMETHOD.
Delete
If we now want to delete all subnodes, we first have to derive all subnodes of the hierarchy. We then delete the data directly from the database or via a corresponding DAO, depending on the implementation.
DATA(subnodes) = get_subnodes( user_id   = user_id
                               recursive = abap_true ).

LOOP AT subnodes INTO DATA(subnode).
  DELETE FROM zbs_dmo_team WHERE user_id = @subnode-UserId.
ENDLOOP.
If we now delete the parent node "P0025", we expect all subnodes to be removed from the database.
When checking the contents of the database, only the other nodes are still there.

Assign
An alternative is to assign the data that has not been deleted. In this case, we only need the direct subnodes and assign them to a new node. In this case, we use the node "P0000". which we have to create first.
DATA(subnodes) = get_subnodes( user_id   = user_id
                               recursive = abap_false ).

LOOP AT subnodes INTO DATA(subnode).
  UPDATE zbs_dmo_team SET team_leader = 'P0000' WHERE user_id = @subnode-UserId.
ENDLOOP.
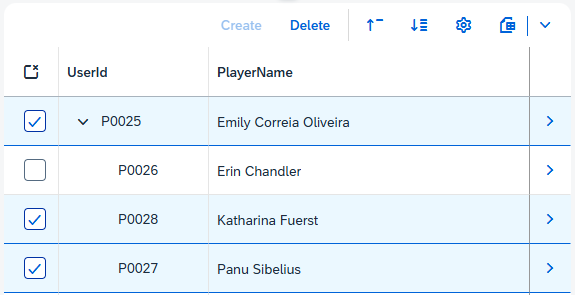
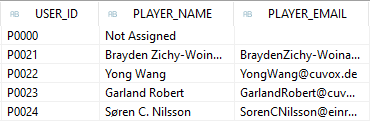
To do this, we create the node for "Not Assigned" and delete the node "P0020". This should then move the entries.

In the database, the node "P0020" has been deleted, all other nodes are still available.
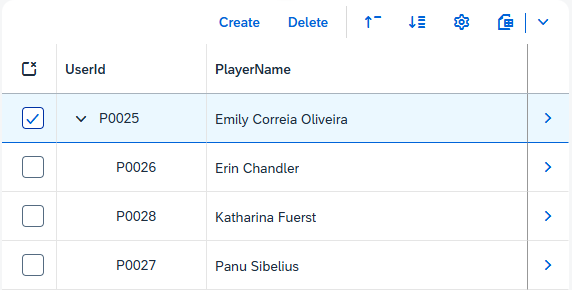
Finally, if we take a look at the display in our Elements Preview, the nodes have been cleanly moved and are available under the new top node.

Complete example
As always, you can find all changes to the app in the GitHub repository. You can find the changes made to the RAP object via the commit.
Conclusion
At the moment, the tree seems to be working somewhat differently than expected. You should make it clear to your colleagues what they can expect and what doesn't work to avoid handling errors. Basically, you now have two options for influencing the behavior accordingly.
Further information:
SAP Help - Treeviews: Architecture Overview
SAP Help - Defining the Behavior for the Hierarchy