Fiori for ABAP - Navigation
In RAP we have defined different entities with navigation and object pages, but these are not present in our Fiori Elements? Let's look at the behavior and the solution.

Table of contents
In this article, we'll take a detailed look at the generation of navigation and object pages and what the generation process entails.
Introduction
Our Sales App consists of various components and entities. On the object page, we've integrated three additional entities: the information, the salesperson, and the sold items. All of this information is modeled as independent entities and, by default, has its own object page. When we preview the objects in our RAP application, we notice that a navigation menu is displayed at the end of the table rows. This navigation suggests that we can navigate directly to the respective object page of the subordinate entities.
In contrast, let's look at the generated application in Fiori Elements. In the preview from the Business Application Studio, we see that the navigation attribute is missing from the table. Basically, we cannot click on this data record and therefore cannot navigate to the object page.

Background
In the preview mode of our service, the RAP application, we can use all navigation automatically and don't need to remodel anything here. This is primarily for testing purposes and is very convenient. However, it also has disadvantages; for example, if we want to deactivate a navigation, it is and remains active by default in the preview. If we then switch to the Business Application Studio to generate our actual main application, we define the UI state there. When running the Fiori Elements Generator, we select the actual List Report View in the main entity step. By default, the object page is generated automatically.

In this step, we also had the option to define a navigation item. This means that navigation to a corresponding object page is created. We left this field empty during the initial generation to be able to test other things first. Basically, a navigation item can be defined here. However, since we have three additional entities in our application, we would theoretically have to manually rework it anyway.
Navigation
In this chapter, we will look at the structure of the navigation. We will go through the various steps necessary to activate the navigation and include the object page.
Page Map
To extend our application, we want to add a new object page and will use the Page Map tool within the SAP Fiori Tools for this purpose. However, the current challenge is that the button for adding new entities and pages is disabled.

To reactivate the button, we first need to adjust the UI annotation for the Create button in the ZBS_C_SASALE metadata extension. Originally, we wanted to disable the default Create action in the OData service to use only our own factory actions. However, it turned out that active Create permission at the metadata level is a prerequisite for using the Page Map to add new pages and entities.
//@UI.createHidden: true
@UI.lineItem: [{criticality: 'DataCriticality'}]
annotate view ZBS_C_SASALE with
Once we have completed these adjustments, the next step is to update the service's metadata in our project. To do this, right-click on the manifest.json file and select "Service Manager".

This opens the manager for managing the existing services. Use the pencil icon to edit the relevant service and then select the "Refresh & Save" button. This process reloads the service and its metadata, updates the local annotations, and saves the entry to the project. This should make new changes visible to Git.

If you restart the Page Map, the Add button should now be active again.
New Page
Now click on the Add (plus button) for the Object Page. A corresponding popup will appear, which will take us to add a new page. There, we select the Template Object Page, since we want to create a new detail page. As the data source, we select the association _SASold to establish the corresponding relationship. After that, you can complete the action using the Add button.

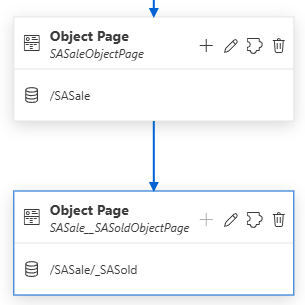
After generation, the new object page will be displayed below the existing object page in the hierarchy. A corresponding navigation will also be created between the two pages, reflecting the relationship.
manifest.json
In the last article, we took a detailed look at the "manifest.json" file and examined the importance of its individual components. The action now performed via the Page Map has caused significant changes. Various components of the manifest file were adjusted, and new components were generated:
- New "Routes" - A new route was created for the parent Object Page with the corresponding targets. This ensures the structural accessibility of the new page within the app navigation.
- Navigation Adjustment - A new navigation was defined for the Sales Object Page, specifically to our new Object Page for the sold materials.
- New "Target" - A new target for the object page was generated with a unique ID, a suitable description, and the necessary navigation attributes for correct display.
Hint: Manual adjustment of the file is also possible. You don't necessarily have to use the page map; you can also make the changes manually. However, this is significantly more time-consuming, as you need to know exactly where in the routing and in the targets you need to insert which change.
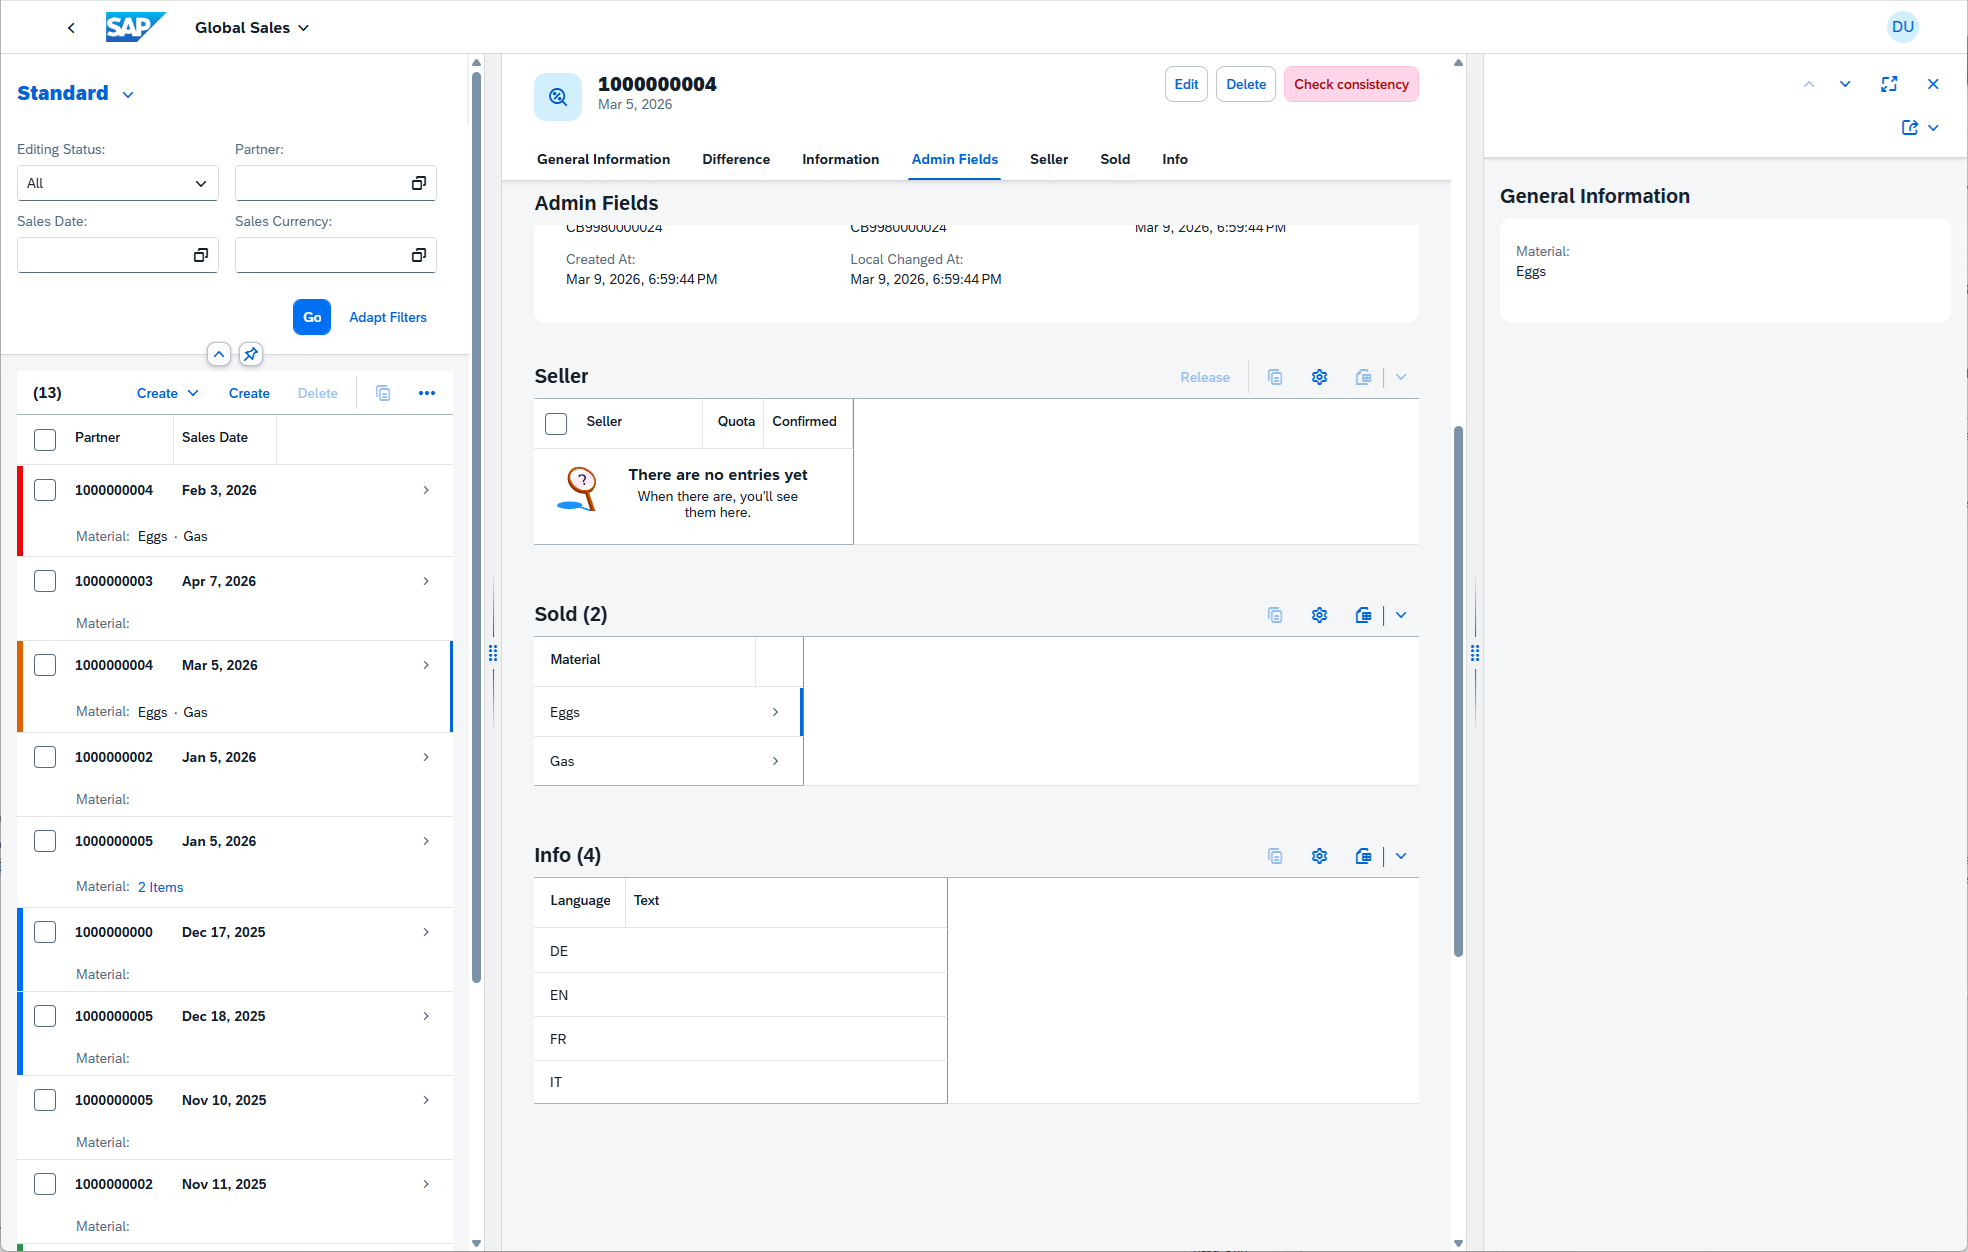
Test
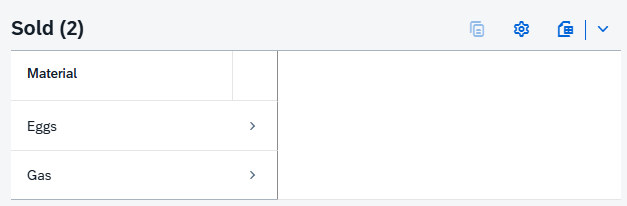
After completing the adjustment, we can run our application. To do this, we start the application in preview mode and select a data record to access the object page. Here we see the corresponding materials, with navigation to the second object page already active. Clicking on a material loads the object page as a third column. This is primarily because we are currently working with a flexible column layout. If we were using a separate navigation instead, we would now be navigating to the second page in full screen.
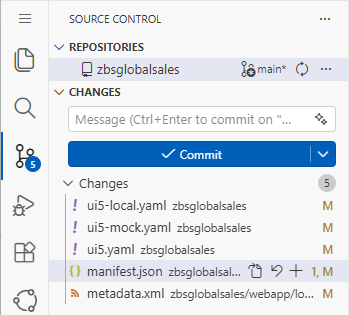
Staging
After making the changes, you will find an overview of the modified files in the Source Control tab. Clicking on it will take you to all the files that have changed as a result of our adjustments. Here you can check in detail which changes have been made or, if necessary, revert specific files directly to their original state (Discard Changes). In our case, we need to commit all changes to our GitHub repository so that the latest version is available again. This is especially important if other colleagues also want to work with it. To do this, you enter a commit message and press the commit button to perform the local commit.
However, this local commit has not yet resulted in any changes being posted to our GitHub repository. For that, we need to click the blue "Sync Changes" button. Press to commit the changes to the central Git repository. Depending on your authentication method, you may need to authenticate with GitHub again to confirm that you have the necessary developer permissions. After the push process is complete, the changes are available in the repository and visible to all team members.

Complete Example
You can find the saved resources for our application in our GitHub repository. This will allow you to track all future changes to the Fiori app or use the resources for deployment. The current changes can be found in this Commit.
Conclusion
With a large number of entities, not all navigations and object pages are always created directly during project initialization and generation. Therefore, it is important to create the additional object pages and navigations retrospectively via the Page Map. Otherwise, after deployment, you will find that only part of the navigation works, even though everything appeared correct in the local RAP Preview.