Flutter - Develop own packages (Part 1)
This article is about developing your own package in Flutter and using it in your projects so you don't always have to copy code to the next project.
Table of contents
In one of our current projects we had the problem that we always reused some components from project to project, but we copied the code manually. This created the problem that changes and bug fixes had to be made manually in all other projects.
For this reason, we took a look at the package development in Flutter to make these components available centrally and to maintain them in one place only.
Reuse
For our apps we use a few key components that we can reuse in every project to provide a similar look and feel. It also reduces the development time for new apps. Typical components would be:
- Login and register screen
- Translations
- Error handling
- Provider objects
- Routing
- Data management
- Basic design (color, font, size and form)
When copying to different projects, there may be different adjustments or bug fixes. This would be the right time to outsource the components in a separate package.
Creation of the package
In this case, we create a new package to be able to outsource our components. Our examples therefore relate to Android Studio, because we have had the best experience with this application so far and everything is provided for app development.
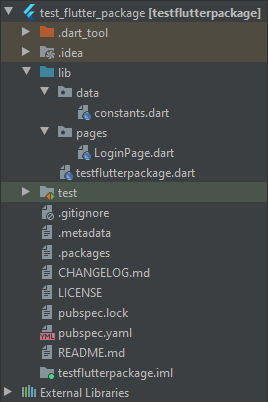
Via "File -> New -> New Flutter Project ..." we create a new flutter package. It is given the name "test_flutter_package" for our test.
The generated library is given the name "testflutterpackage" and the file with the same name you can find in the lib directory. This is the starting point of the package for deployment. For the test, we create additional objects that we want to provide with this package.
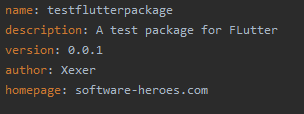
If you need further external packages for your development, you can integrate and load them as usual via the pubspec.yaml file. Here the package behaves like a normal flutter app when you develop. Some additional information can also be stored.
Git
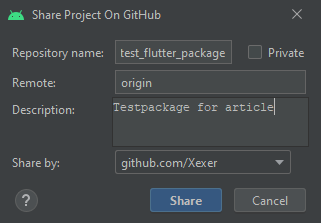
The package can be provided locally or via Git. Since we want to backup our package at the same time, we will upload it to Github in the next step. For this we use the integrated version management of Android Studio. We upload the package via the menu item "VCS -> Import into Version Control -> Share Project on Github". After uploading, the initial commit is carried out and the package is checked in.
Hint: Here you also have the option to set the package to Private if you only want to use it for your projects and you don't want everyone to see it. You will probably have to log in with your account to create the link.
Implementation
We create a new app and integrate the created package. Since it cannot be integrated directly via pub.dev, because we have not published it there, we have to do it in a different way. Below is the example from the pubspec.yaml.
After executing the command "pub get" the package is downloaded from the path and integrated into the project. You can now find the files under the External Libraries and can use the package. After implementing the following code:
import 'package:flutter/material.dart';
import 'package:testflutterpackage/pages/LoginPage.dart';

void main() {
  runApp(MyApp());
}

class MyApp extends StatelessWidget {
  @override
  Widget build(BuildContext context) {
    return MaterialApp(
      title: 'Flutter Demo',
      home: LoginPage(),
    );
  }
}
After the start, the app is loaded correctly and we find the start page that we have defined in the package. This completes the implementation of a pure dart package.
Conclusion
The development and provision of a package for Flutter is not very difficult and with our little guide you should not have a problem in the future. In our next article on the series, we will deal with the topic of local testing in a package so that you can easily develop your components further.


