BTP - OData Access from On-Premise
In this article we will go into a little more detail about how to consume an OData service on the on-premise from an ABAP environment.

Table of contents
In previous scenarios, we mainly assumed that we read data from the on-premise system or other systems. In this article we look at the consumption of services from the on-premise system and how the ABAP environment can provide us with data. In an older article we looked at how we can create a new entity from the on-premise system.
Introduction
The ABAP Environment is primarily used to expand on-premise scenarios and to build decoupled applications in the BTP. Therefore, we use different types of communication (OData, SOAP, RFC) to access data from the on-premise system. If we now want to read data from the ABAP Environment that is made available to us, we can do this too, but we have to take a few steps. However, implementation on-premise is not that easy because the consumption model is not currently available.
ABAP Environment
However, before we call the ABAP Environment, we have to go through a few configuration steps on the environment.
Service Binding
In the first step we create a new service binding on the service definition, here we use the service from our Simple RAP training. We want to use the partner database on-premise.

We use an OData v2 service as a Web API version, which we give it an appropriate name. In the lower part the service definition is given again as a basis.

Hint: Afterwards, don’t forget to activate and publish the service binding so that the endpoint is actively available.
Communication Scenario
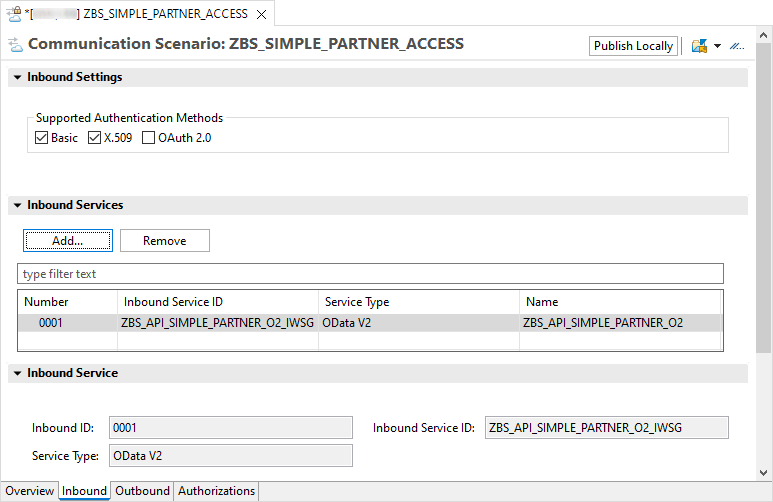
In the second step, we need a communication scenario in order to be able to assign the service and the corresponding authorizations. The scenario later regulates which services can be used by a user and a connection, so we have to actively set the appropriate settings. In the ADTs you can find the corresponding entry via the context menu “New -> Other Repository Object”.

After we have given a name and the scenario has been created, we switch to the “Inbound” tab, where we add our service using the “Add” button. The name of the service differs slightly from the service binding, but you can find it quite easily using the search.
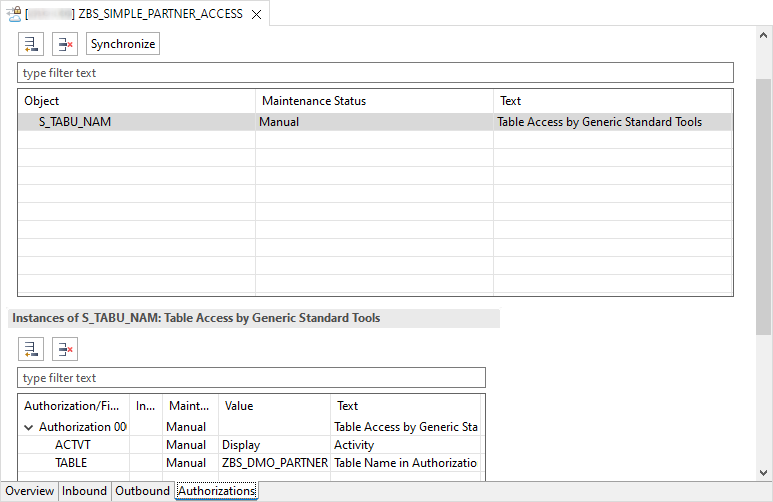
In the next step, we switch to the “Authorizations” tab and now grant authorization to read the data in the table. To do this, we add the authorization S_TABU_NAM and fill the fields with the appropriate values for our table.
Hint: Finally, be sure to press the “Publish Locally” button, then the communication scenario will be made available in the launchpad for configuration.
Communication Arrangement
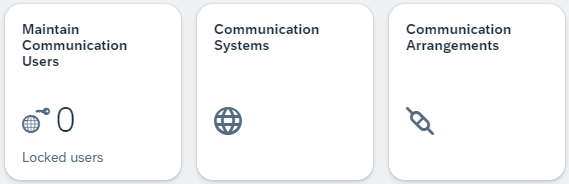
In the last step we have to set up the communication arrangement. To do this we need permissions for the following three apps, whereby we only actively start "Communication Arrangements". You can find the authorizations in the Business Catalog "Communication Management" (SAP_CORE_BC_COM):
So let's now open the Communication Arrangements app and create a new arrangement using the "New" button. We are looking for our previously created communication scenario.

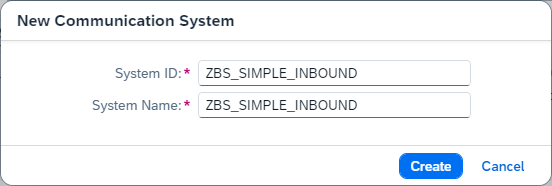
Since we now also need a new communication system, we can create this directly from the detail screen using “New”.

In the dialog we will now assign a new name. Here you should stick to your naming conventions or define what such systems are called.
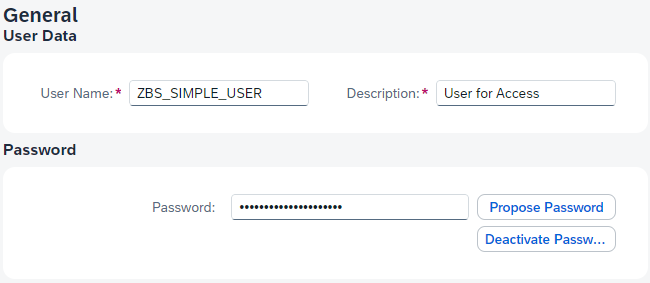
Before we create the user for access, we define the system as “Inbound only”. For this you will find a checkbox in the communication system in the “Technical Data -> General” area. In the lower section “Users for Inbound Communication” we now have to create a new user using the “+” button. Select the “New” button in the dialog.

Now we assign a corresponding name for the technical user, as well as a suitable and strong password, which we then need for the on-premise configuration.
Finally, we confirm and save the user and the system until we are back in our communication arrangement. The user and system that we had previously created should now be stored there. In the lower part you can see the authorized services in the system, as well as the path to access the service.
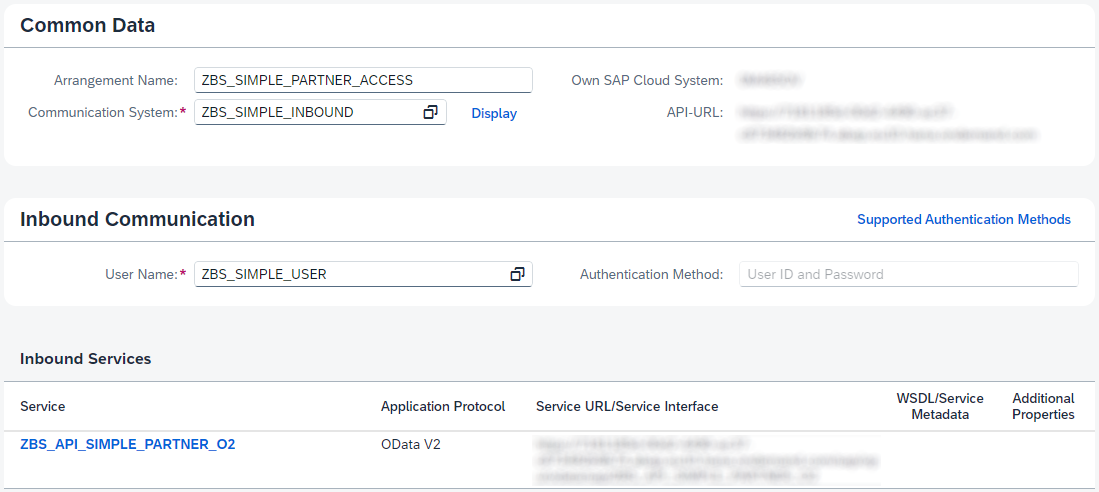
So that you know that the configuration worked and the user has the appropriate permissions, you can copy the service path and open it in the browser. Login should now be required and after entering the user and password, we should get an overview of the entities.
On-Premise
After setting up the ABAP environment, the on-premise system now needs to be configured so that we can access and use the new endpoint.
Destination
The first step is to establish a connection to the ABAP Environment. The easiest way to do this is to create a connection in transaction SM59. To do this, we set up a new connection of type "G", we define the system "<ID>.abap.<region>.hana.ondemand.com" as the host and the port 443, since we want to communicate via HTTPS.
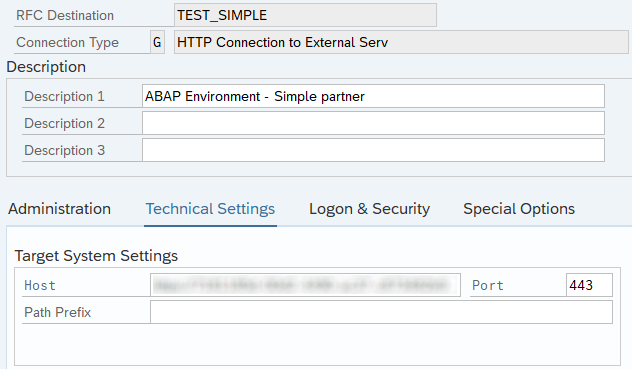
In the “Security & Logon” tab we store the technical user and password; login takes place here using “Basic Authentication”. Activate SSL in the lower part and secure the new connection. The connection test should now give us a status code of 200, meaning the connection is set up.
Execution
Using CL_HTTP_CLIENT and our new connection we create a client to access the endpoint. We control the endpoint via the additional header field, set the corresponding path to the service, the entity and would like to have a JSON as the result.
cl_http_client=>create_by_destination( EXPORTING destination = c_destination
                                       IMPORTING client      = mo_http_client ).

mo_http_client->request->set_header_field(
    name  = '~request_uri'
    value = '/sap/opu/odata/sap/ZBS_API_SIMPLE_PARTNER_O2/Partner?$format=json' ).
Let's take a look at the call in the browser and see the structure of the JSON. To do this, we now have to set up a corresponding mapping to get the data into an ABAP format.
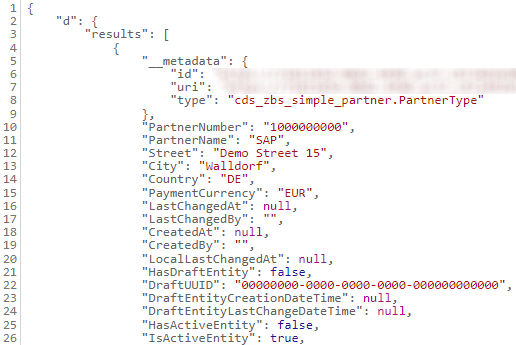
To do this, we set up appropriate types that reflect the JSON structure. You can leave out fields and information that you will not need later for processing.
TYPES: BEGIN OF ts_data,
         PartnerNumber   TYPE char10,
         partnername     TYPE text60,
         street          TYPE char80,
         city            TYPE text60,
         country         TYPE land1,
         paymentcurrency TYPE waers,
       END OF ts_data.
TYPES tt_data TYPE STANDARD TABLE OF ts_data WITH EMPTY KEY.

TYPES: BEGIN OF ts_result,
         results TYPE tt_data,
       END OF ts_result.

TYPES: BEGIN OF ts_root,
         d TYPE ts_result,
       END OF ts_root.
After mapping via /UI2/CL_JSON=>DESERIALIZE, our data looks like this in the debugger:

Full example
Here is the complete example of the class that calls the service and converts the data from JSON to an internal table. We have omitted corresponding error handling in this example, but of course it belongs in the productive source code.
CLASS zcl_bs_demo_simple_access DEFINITION
  PUBLIC FINAL
  CREATE PUBLIC.

  PUBLIC SECTION.
    INTERFACES if_oo_adt_classrun.

    CONSTANTS c_destination TYPE rfcdest VALUE 'TEST_SIMPLE'.

  PRIVATE SECTION.
    TYPES: BEGIN OF ts_data,
             PartnerNumber   TYPE char10,
             partnername     TYPE text60,
             street          TYPE char80,
             city            TYPE text60,
             country         TYPE land1,
             paymentcurrency TYPE waers,
           END OF ts_data.
    TYPES tt_data TYPE STANDARD TABLE OF ts_data WITH EMPTY KEY.

    TYPES: BEGIN OF ts_result,
             results TYPE tt_data,
           END OF ts_result.

    TYPES: BEGIN OF ts_root,
             d TYPE ts_result,
           END OF ts_root.

    DATA mo_http_client TYPE REF TO if_http_client.

    METHODS call_service_and_get_json
      RETURNING VALUE(rd_result) TYPE string.

    METHODS convert_json_to_data
      IMPORTING id_json          TYPE string
      RETURNING VALUE(rs_result) TYPE ts_root.
ENDCLASS.


CLASS zcl_bs_demo_simple_access IMPLEMENTATION.
  METHOD if_oo_adt_classrun~main.
    DATA(ld_json) = call_service_and_get_json( ).
    DATA(lt_data) = convert_json_to_data( ld_json ).

    out->write( lt_data ).
  ENDMETHOD.


  METHOD call_service_and_get_json.
    cl_http_client=>create_by_destination( EXPORTING destination = c_destination
                                           IMPORTING client      = mo_http_client ).

    mo_http_client->request->set_header_field(
        name  = '~request_uri'
        value = '/sap/opu/odata/sap/ZBS_API_SIMPLE_PARTNER_O2/Partner?$format=json' ).

    mo_http_client->send( EXCEPTIONS http_communication_failure = 1
                                     http_invalid_state         = 2
                                     http_processing_failed     = 3
                                     http_invalid_timeout       = 4
                                     OTHERS                     = 5 ).
    IF sy-subrc <> 0.
    ENDIF.

    mo_http_client->receive( EXCEPTIONS http_communication_failure = 1
                                        http_invalid_state         = 2
                                        http_processing_failed     = 3
                                        OTHERS                     = 4 ).
    IF sy-subrc <> 0.
    ENDIF.

    mo_http_client->response->get_status( IMPORTING code   = DATA(ld_code)
                                                    reason = DATA(ld_reason) ).

    rd_result = mo_http_client->response->get_cdata( ).
  ENDMETHOD.


  METHOD convert_json_to_data.
    /ui2/cl_json=>deserialize( EXPORTING json = id_json
                               CHANGING  data = rs_result ).
  ENDMETHOD.
ENDCLASS.
Conclusion
We have now made data from an ABAP environment available to an on-premise system and can continue to work with it. The connection requires a number of steps before the actual access works, but with the help of the article it should no longer be a problem.